Data Collection for Kinaki Online Forms

The key components on the Data Collection page are:

  • Publishing the form
  • Choosing the Access Type
  • Sharing the Form
  • Starting and Stopping Collecting Data

As a reminder, first you use the Questions page, Desing Form and Set Logical Flow, to create new questions and input a logical flow for your survey or questionnaire.  Then, on the Data Collection tab you will do the next steps (make sure you have selected the correct Data Collection Tool at the top of the page from the drop down menu).

Publishing the Form

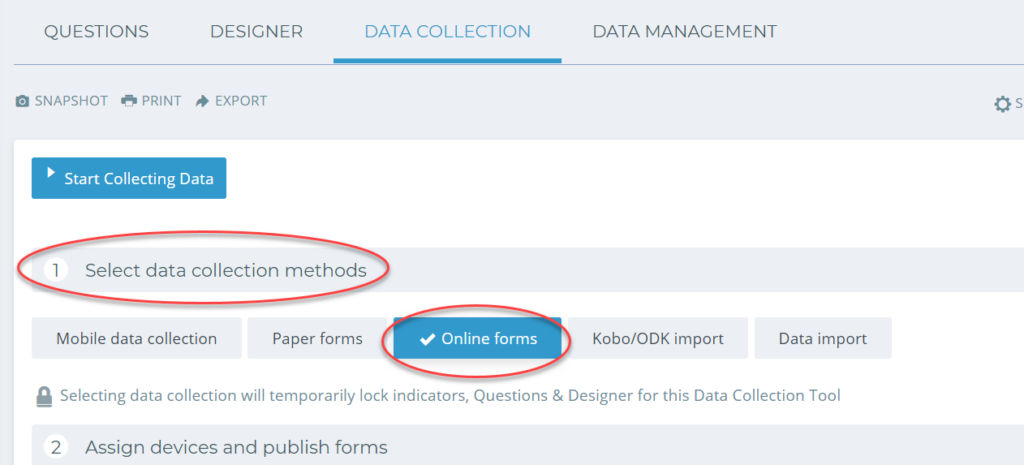
On the “Data Collection” tab you can choose who has access to your Online Forms. You can choose between Public, Password Protected, or Members Only.

  • Public – Anyone with the link will have access to participate in your survey for data collection. 
  • Password Protected – Individuals with the link will have to submit a password to participate.  
  • Members Only – Only users who have been added as Members of the Project in Kinaki will have access to view the form.

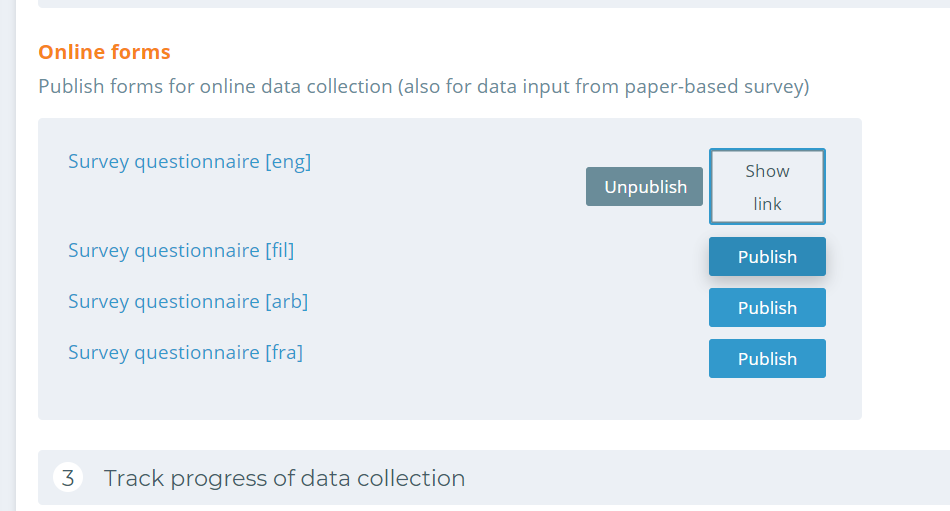
To choose the “Access Type”, select “Publish” next to the name of the form and choose the appropriate Access Type.

Sharing the Form

Now, you’re ready to collect data and share the URL link!

To get the link, select “Show Link” next to the published form. A unique link to the form will appear and you can copy and paste the link and share it with whomever needs it.

Important note: If you “Unpublish” the form at any time it will CHANGE the URL link. If you want to instead temporarily stop receiving data for this form, but keep the same URL, select “Stop Data Collection”.

We recommend sharing the link to the Online Form along with a set of instructions that include:

  • The purpose of the form
  • What data it is helping you collect
  • If relevant, what project or reporting period it is related to
  • Timelines/deadlines for entering the data

Tip: Online Forms can be published in each “Project Language” separately (separate link will be created for each language). You can learn how to create and use Project Languages in the Knowledge Hub.

Starting and Stopping Data Collection

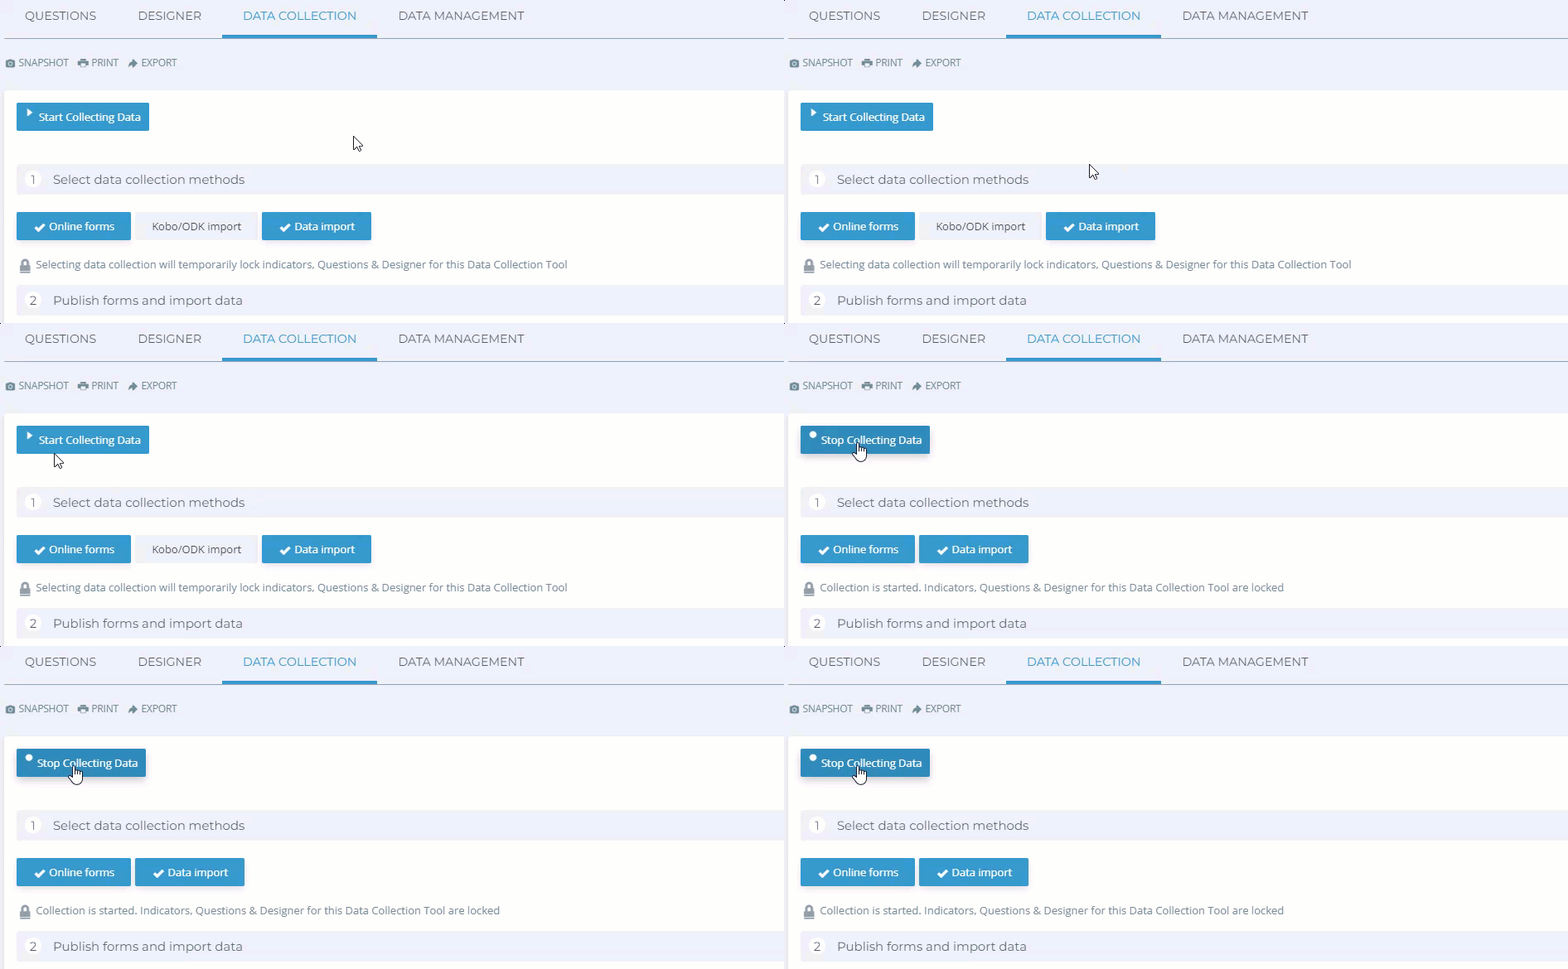
When your Online Form is ready to be used, select “Start Collecting Data” at the top of the page to start the data collection.

You use the same button to stop data collection when you have finished collecting the data needed.

You and participants will now be able to view your survey and fill in the data. 

Important note: Once you start data collection, you cannot make changes to the indicators, questions, or logical flow for this Data Collection Tool. For example, if you are on the “Questions” page and find you can’t edit or enter any questions, check to make sure that data collection has been stopped. (You’ll see a warning in orange text on each page that is locked because data collection has started).

Once data collection has been completed, select the “Stop Data Collection” button on the Data Collection page.

Once data collection is stopped, no one can fill in any data and, instead of the form, they will see a message that says: “Data collection for this form is currently not available. Please contact the Project Administrator.”

This will end current collection and allow you to review any submissions on the Data Management page under “Active Data Set“.

Return to top

Tags: ,

Was this helpful?