KoboToolbox is a free and open-source tool designed to support online and offline data collection through curated surveys.To learn more about KoboToolbox, and how it can help with your data collection, visit KoboToolbox’s Support Centre.
With Kinaki’s ability to analyze data and report results, KoboToolbox can be an exciting opportunity to integrate offline data collection into Kinaki’s cloud-based services.
There are two options for importing data from Kobo to Kinaki for analysis:
Option 1: When you have access to the Kobo XLS and the Data set with XML Values
Option 2: When you do not have access to Kobo Questions, the XLS Form and the Data set with XML Values
In this article we will focus on option 1.
Option 1: Importing Questions from Kobo in XLS Format and then Importing Data from Kobo to Kinaki for Analysis
For this option you will design the survey/questions in Kobo or by using the XLS Form format in Excel.
After your survey/questionnaire is designed you will import the questions from Kobo/Excel to Kinaki in the XLS Form format, and then Import the data from Kobo in the XLS format to Kinaki.
Note: It is important to note here that the questions only need to be imported to Kinaki the first time, for the next data collection cycles you should only import data since the questions are already in Kinaki.
A) Downloading your Questions and Data from Kobo
1) Create a survey and collect your data with KoboToolbox.
Start by creating a survey with KoboToolbox or uploading an XLS Form survey to Kobo. You can find out more about the XLS Form format here.
Using XLS Forms has a steeper learning curve, but makes creating longer surveys easier and prevents some of the issues with making changes to your forms that Kobo form builder suffers from.
Next, deploy the survey in Kobo.
Collect responses from participants by using the Kobo online form, or setting up a mobile device for data collection activities. Once you have received all responses for a given dataset, return to Summary page in Kobo.
2) Download survey questions
The survey questions must be downloaded from Kobo as XLS (the XLS Form format) to be used in Kinaki.
In Kobo, on the project Summary page, choose Form tab (1).
From the list of actions on right, choose More actions by clicking on the three dots (2).
Choose Download XLS from the drop-down menu (3).
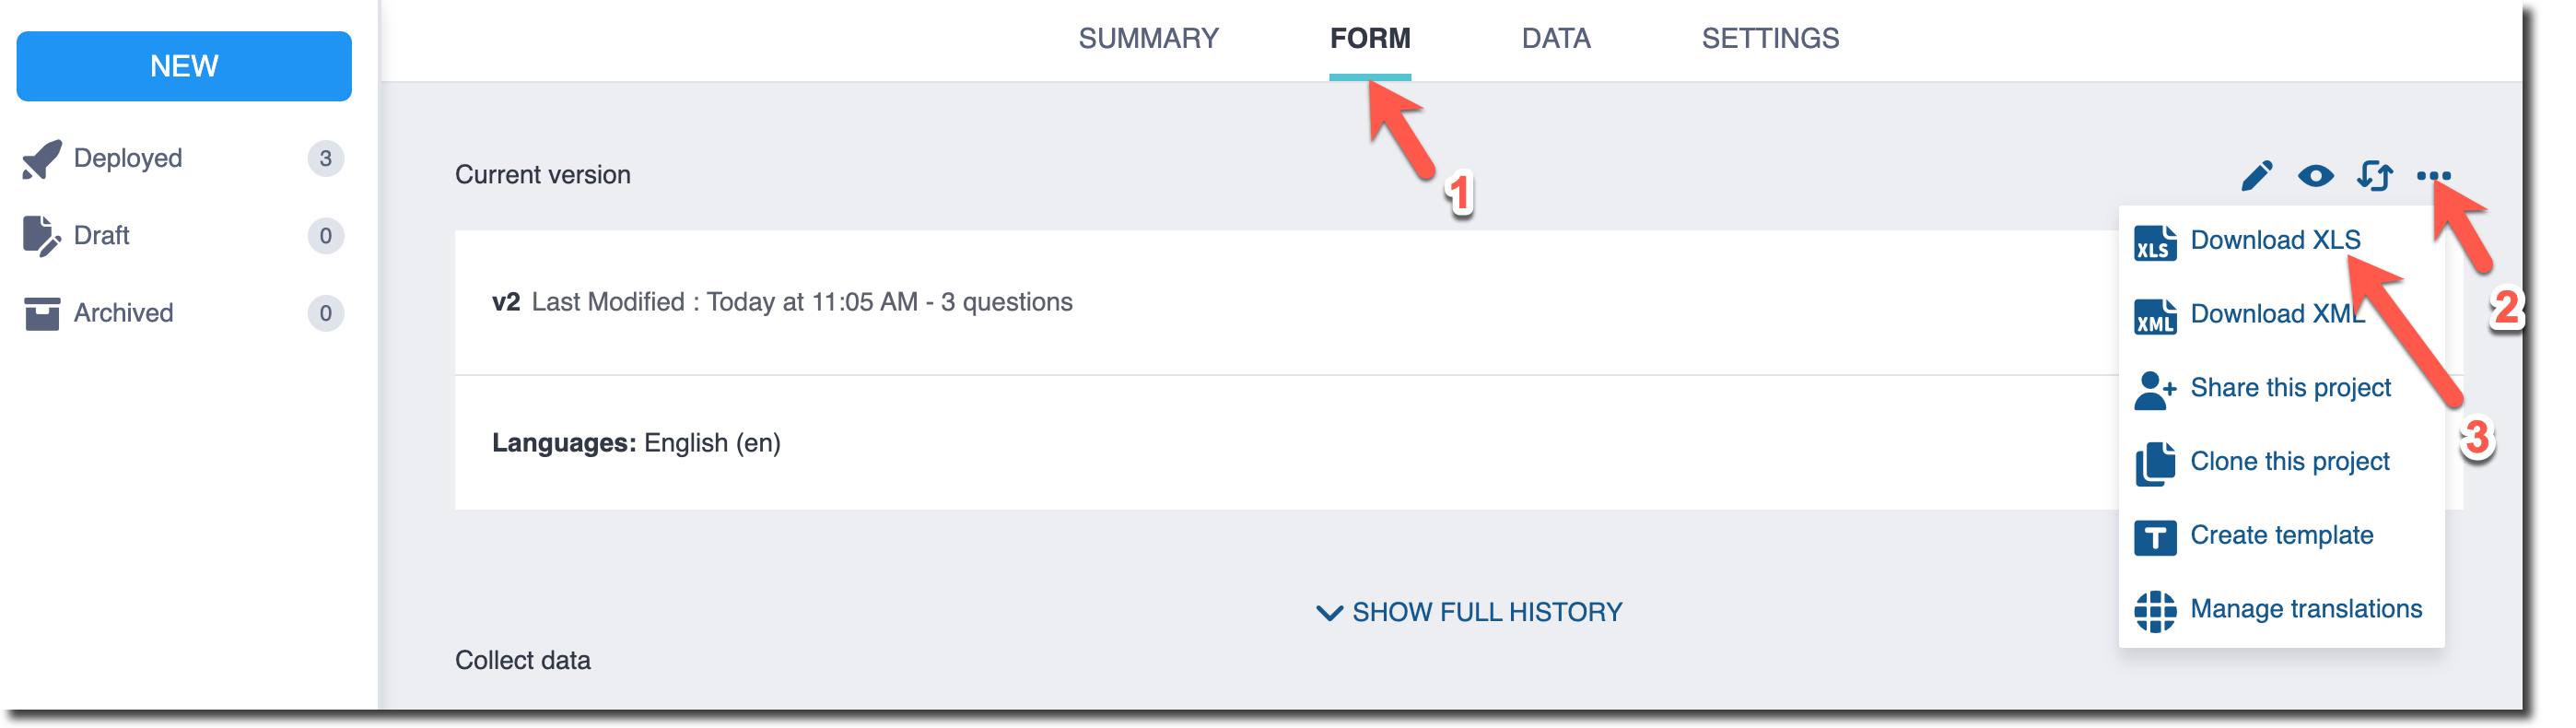
Note: As mentioned earlier, questions only need to be downloaded once or the first time for any data collection tool. For subsequent years or data collection cycles, you only need to download the data. Uploading the form again would only duplicate the questions in Kinaki and should be avoided.
3) Download data
Download data from Kobo: On the Summary page in KoboToolbox, select the Data tab at the top of the page (1).
Next, choose Downloads (2) from the left-hand menu. In this tab, select XLS (3) for Export type, and XML values and headers (4) for Value and header format.
In Advanced Options (4) check the options as shown in the image below, box 5
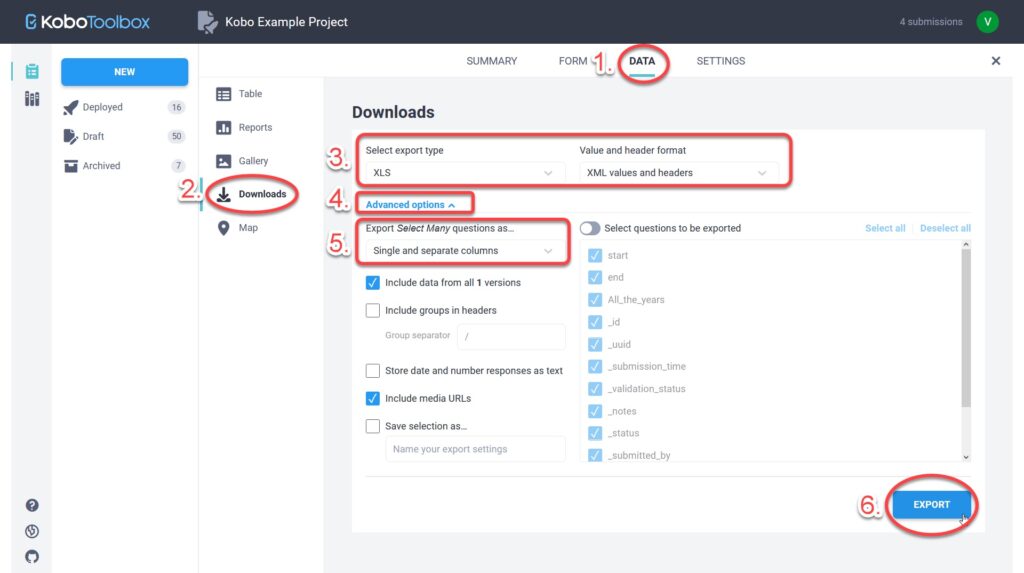
Downloading the excel file with these settings will allow Kinaki to read each question and correctly match the data from your form.
Select Export (6) to generate your file for download.
The file will appear below in the section Exports where, once the file is ready, you can download it using the Download button.
B) Importing Question and Data to Kinaki
4) Import your questions to Kinaki
Open Kinaki and locate the project which will be using the Kobo dataset.
We recommend using an empty data collection tool to import both questions and data for the first import.
Questions should only be imported the first time, as indicated earlier, and for subsequent data cycles, import data to the same DCT.
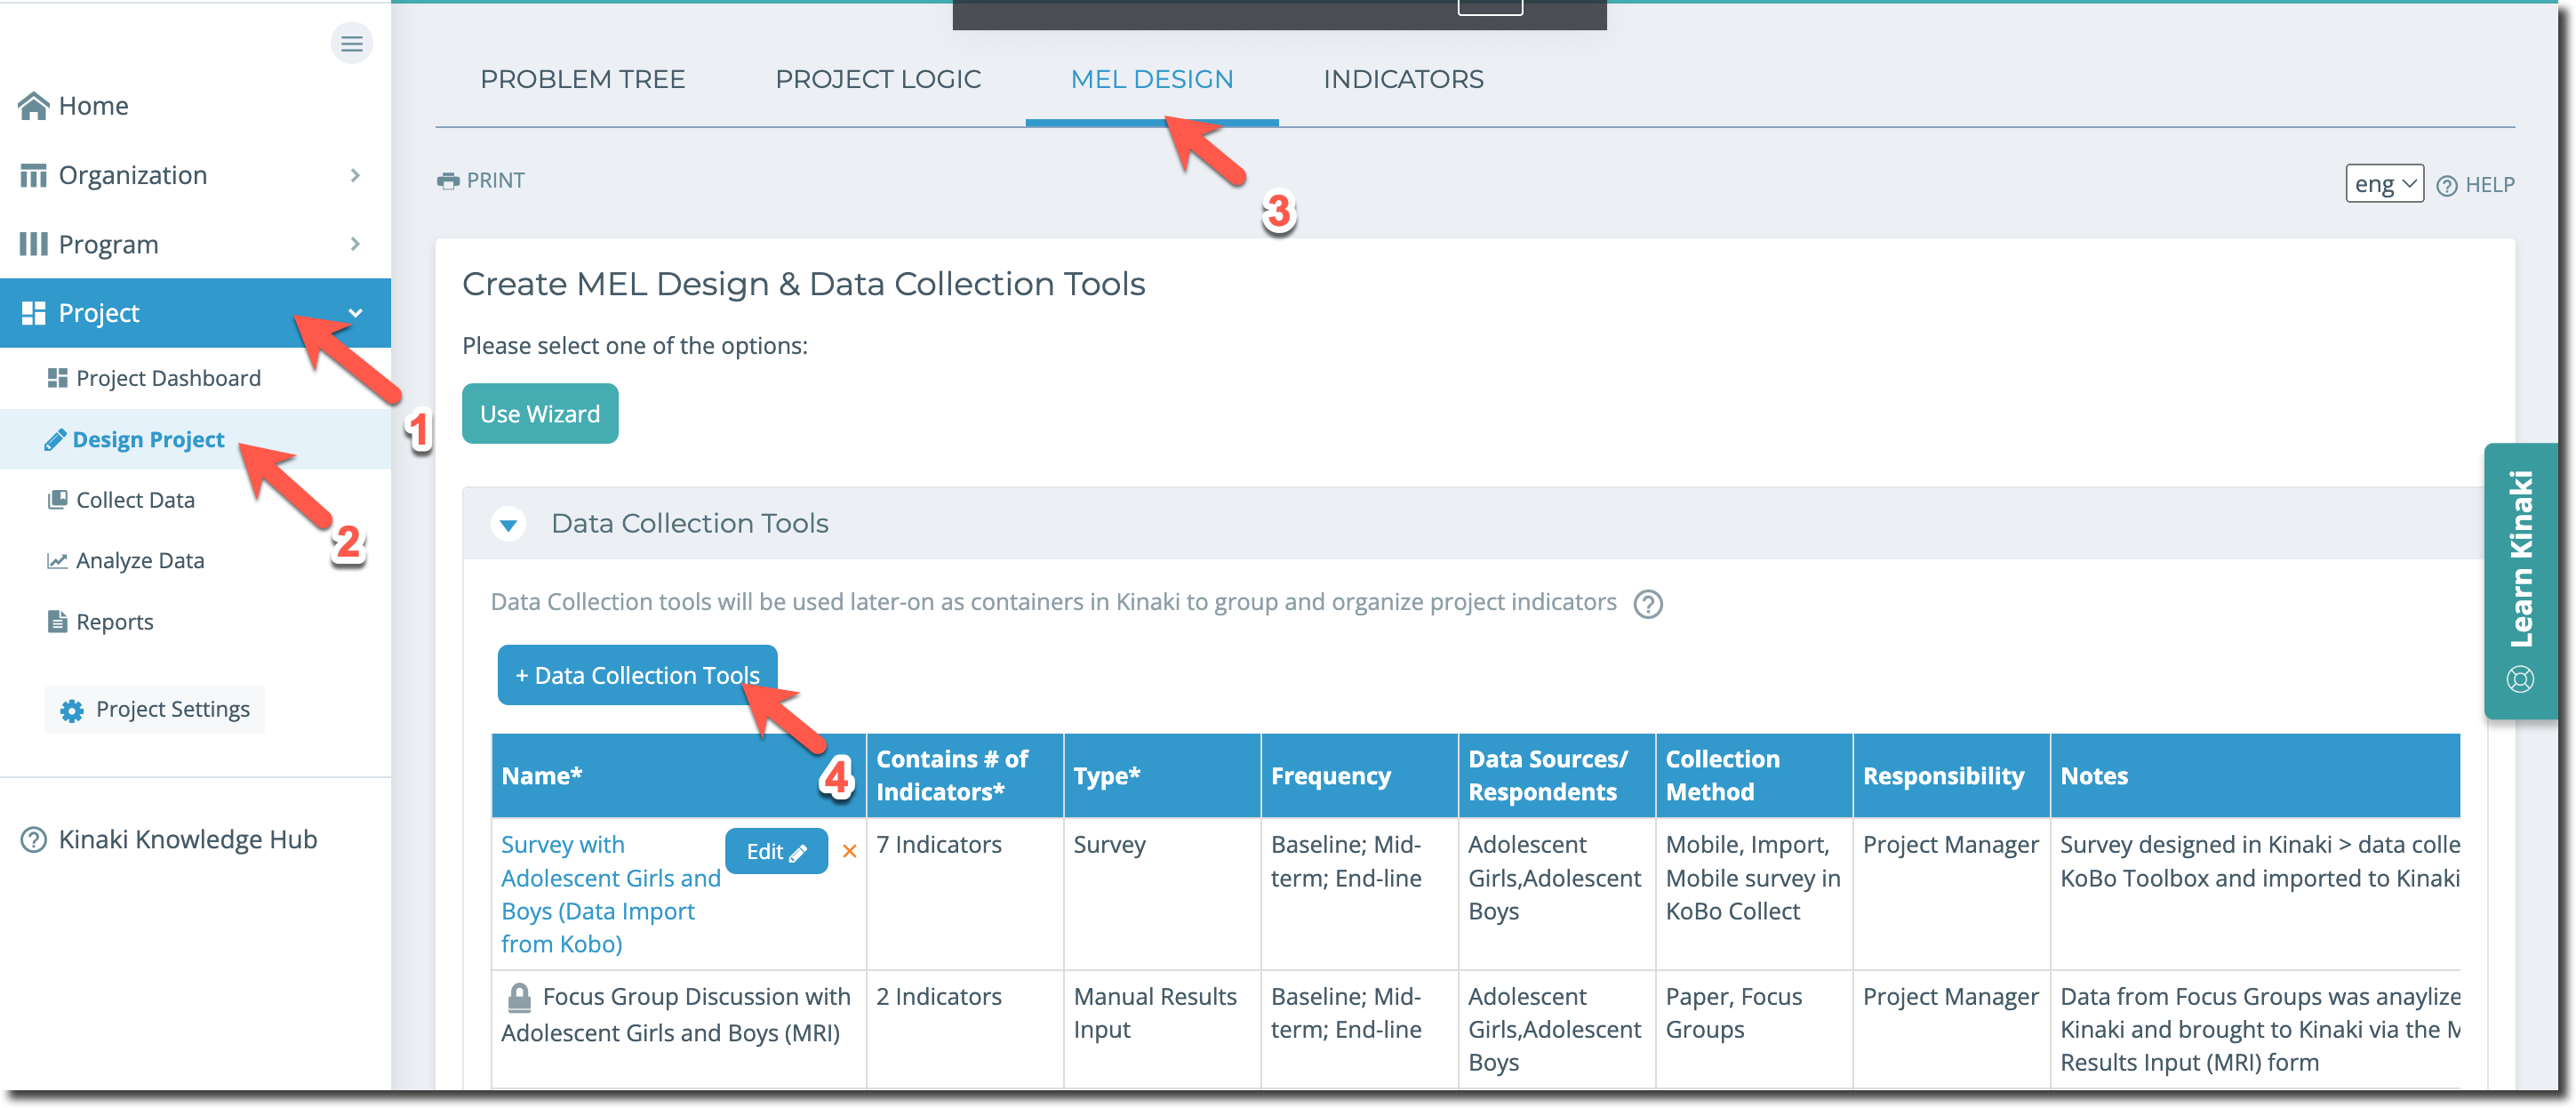
To create an empty data collection tool in Kinaki, go to Project (1), Design Project (2) and then MEL Design (3). Click on + Data Collection Tools (4) and fill in details, and click on Create.
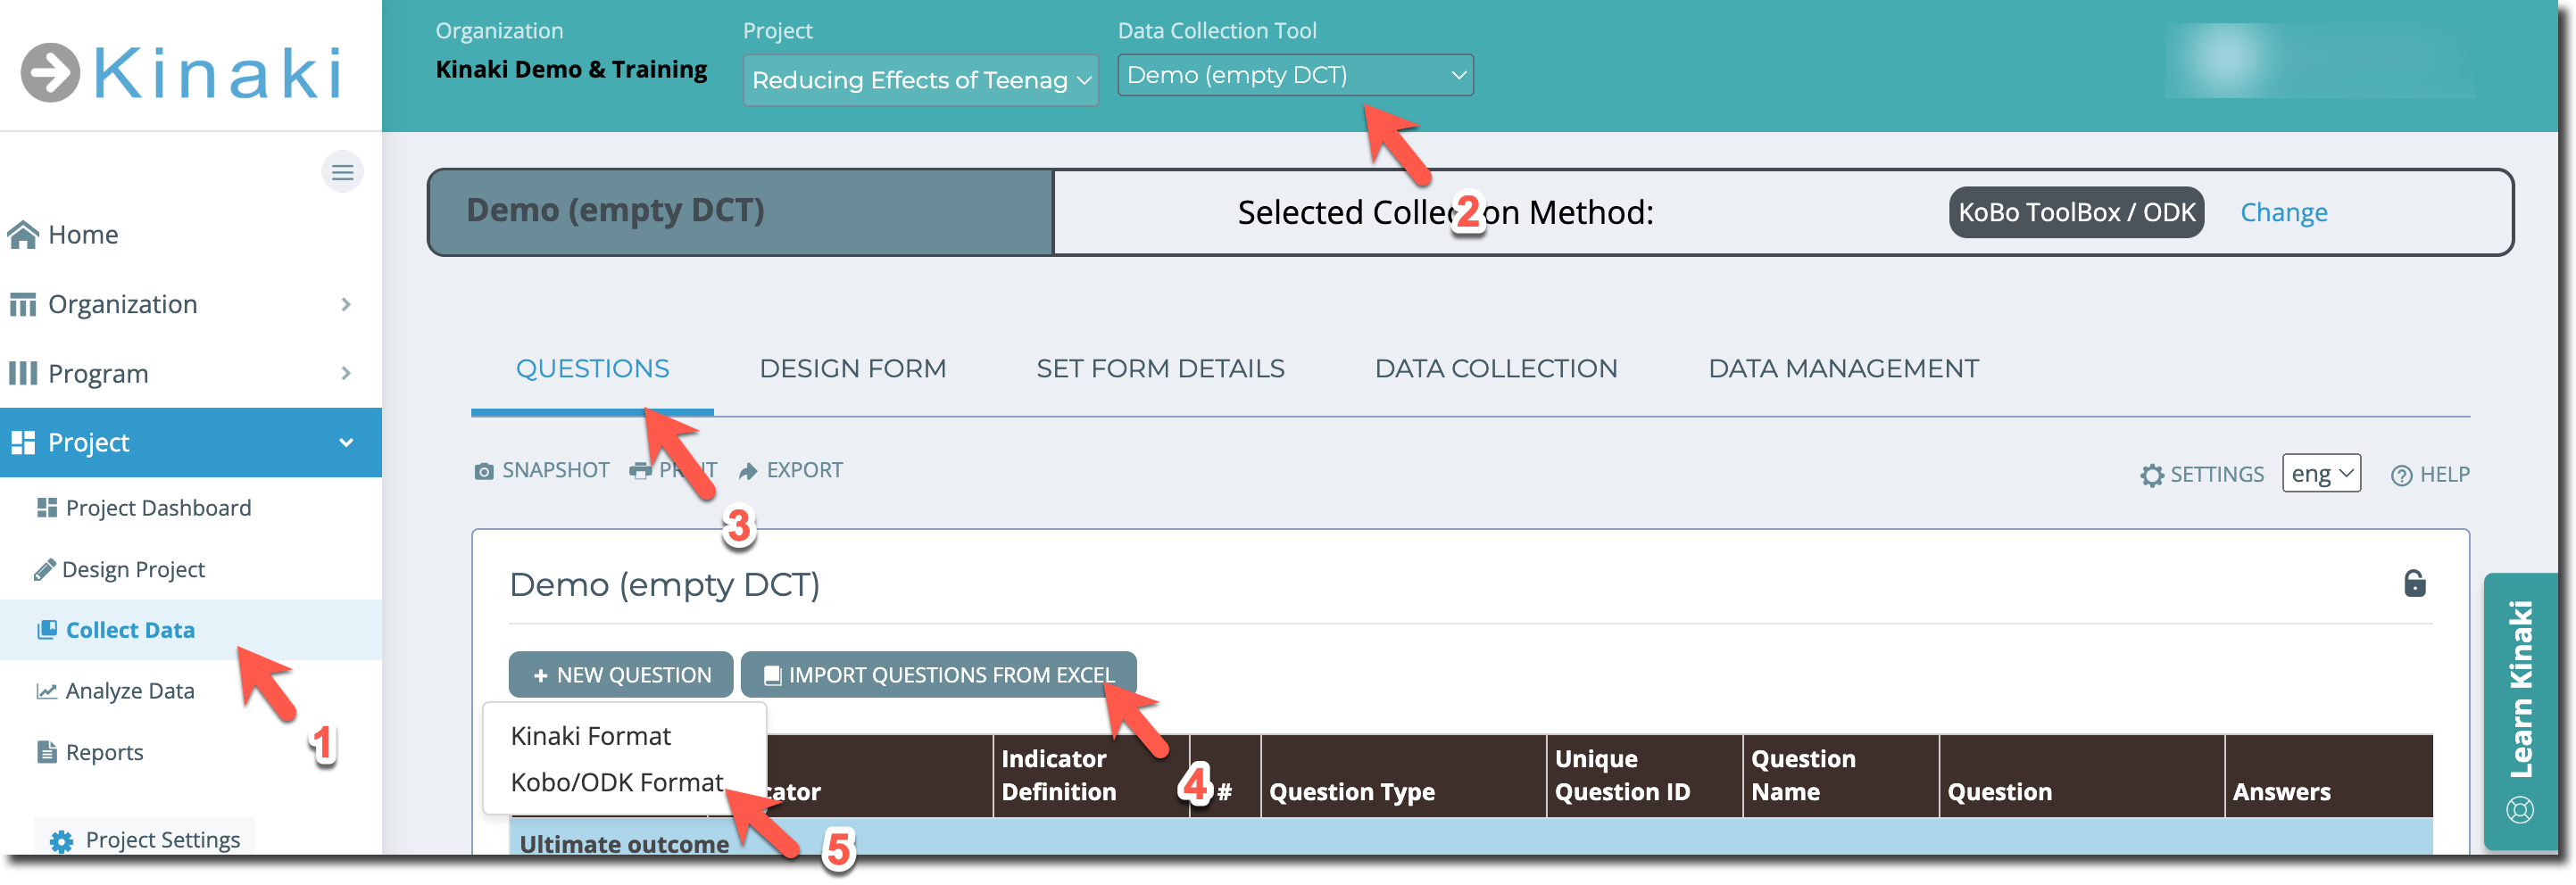
Next, go to the Collect Data (1) section of Kinaki from the left hand menu, choose the empty data collection tool created in the previous step from Data Collection Tool (2) drop down menu, and then choose “KoBoToolBox/ODK” (3) and click on “Select” (4).

On the Questions page upload the questions to Kinaki by going to “Collect Data” (1), choosing “Questions” (2) and then Import Questions from Excel (4). Select the Kobo/ODK Format (5) and under Choose files select the file with your form/questions downloaded from Kobo. Then match the languages (or their codes) from the form to you project languages and click on Ok and Save Qs .
5) Import your data to Kinaki
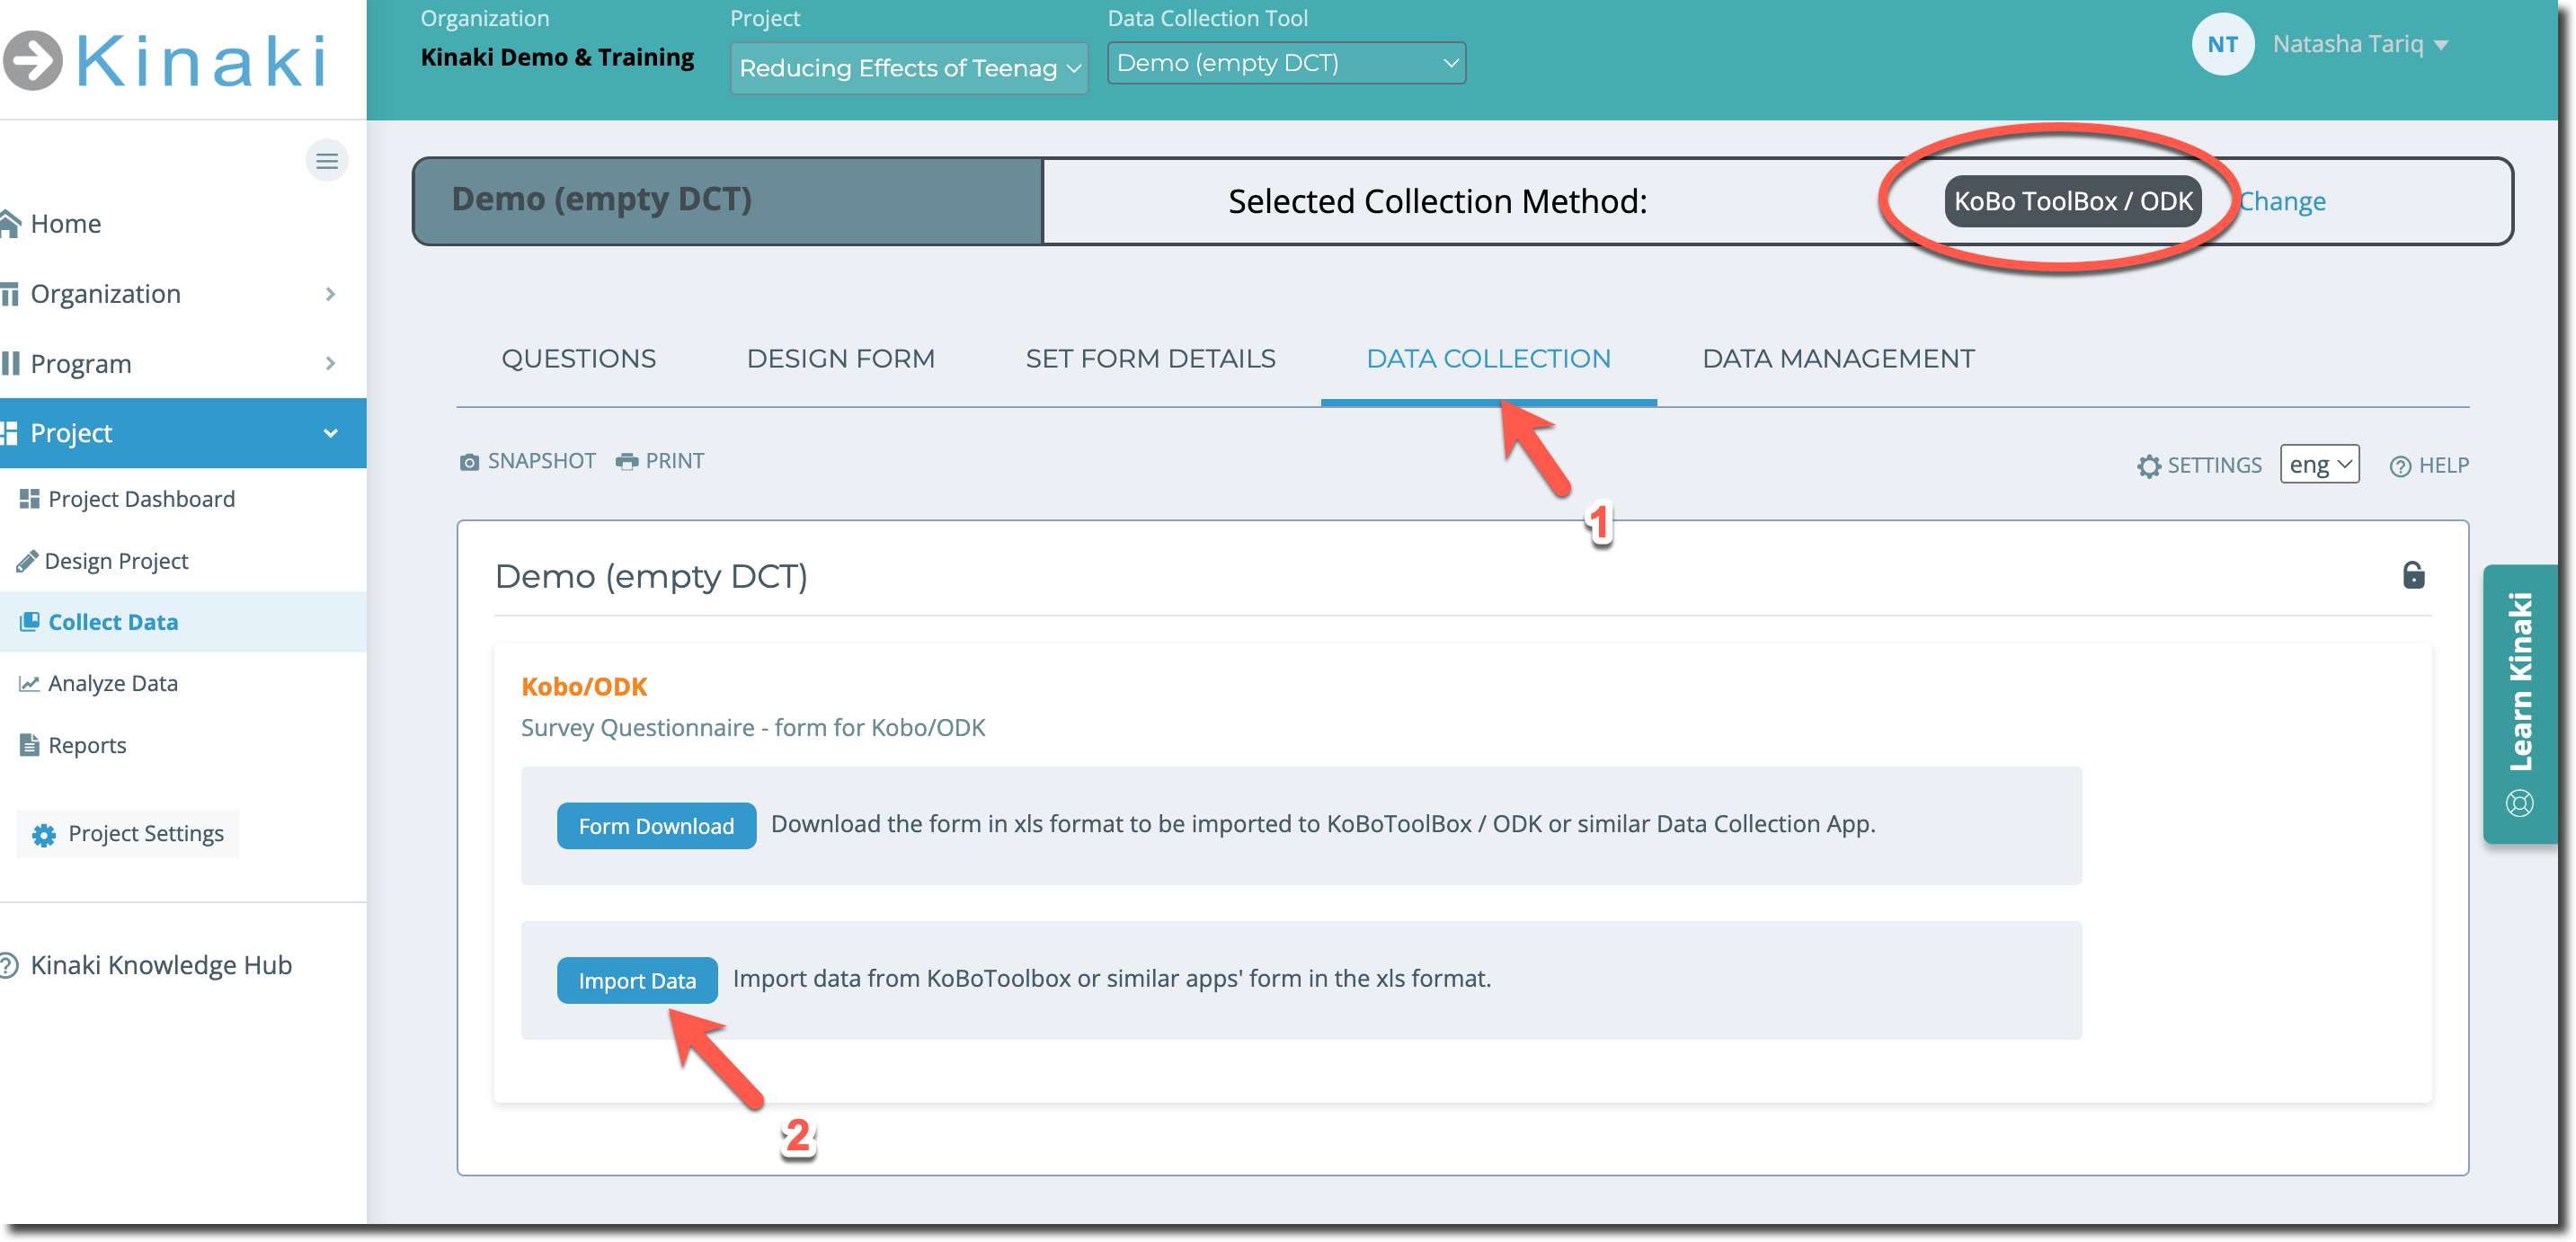
Go to the Data Collection (1) after choosing Collect Data from the main menu and make sure the relevant data collection tool is selected in the drop-down menu.
Also, make sure that “KoBo Toolbox / ODK” is shown where it says the Selected Collection Method.
Choose option Import Data (2) as shown.
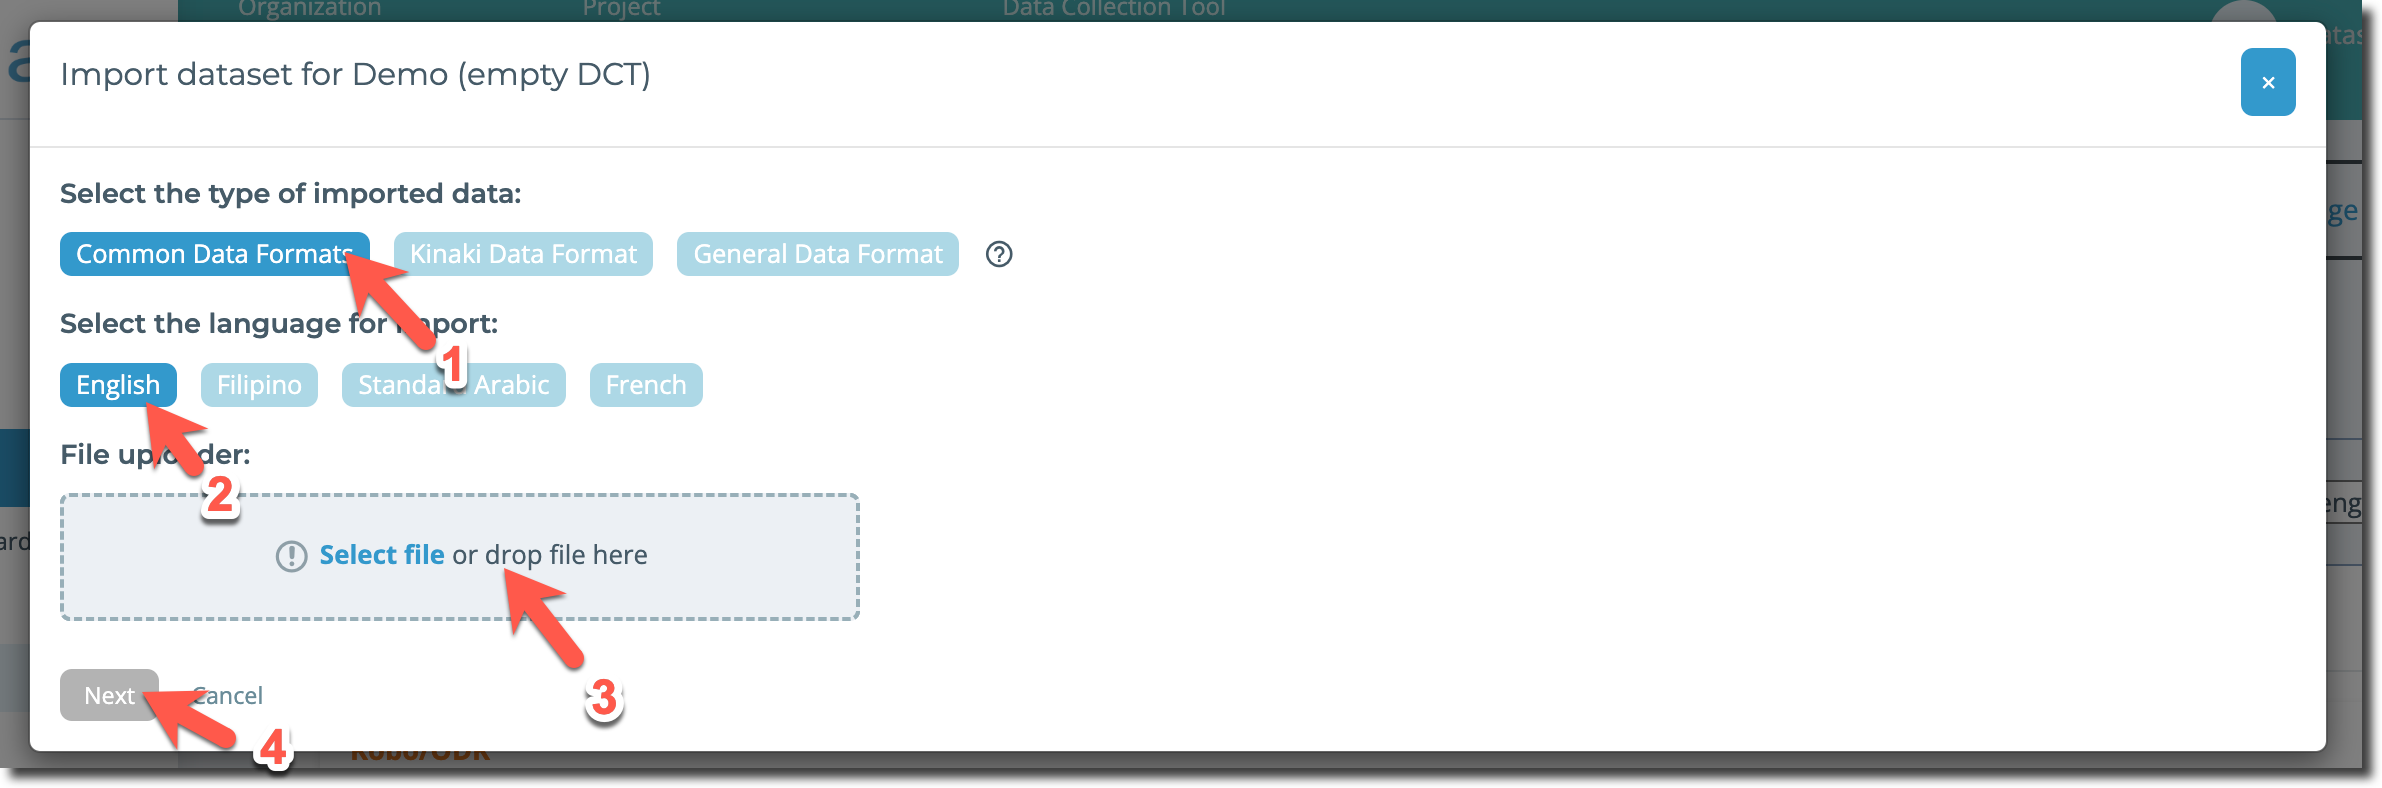
In the data import window, select from different data file layouts. Here, for importing from KoBo, select Common Data Formats (1). Next, select the language of your file (2) from the list of project languages, this is relevant if you exported Labels rather than XML Values from Kobo, if you have a file with the XML values, select any of the languages.
Upload the data file downloaded from KoBo Toolbox by selecting the file or using the drag-and-drop upload (3). Select “Next” (4) to continue.
During the first data import the steps Incompatible Questions and New Answers will be skipped if all went well with the questions import. During subsequent data imports these steps could appear if you made changes to your forms. If one of these steps appear see the detailed description on how to resolve the issues in this Knowledge Hub article with detailed videos, here.
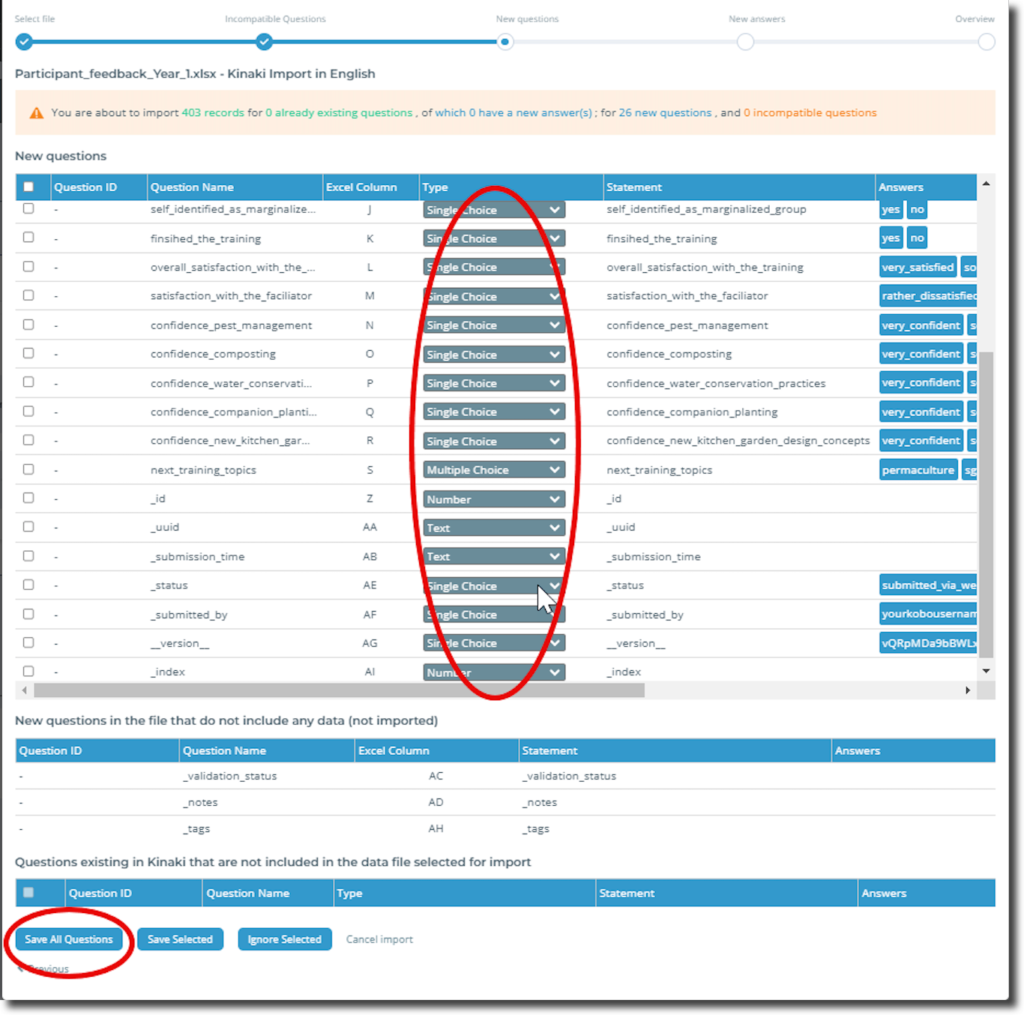
In the step New Questions, you can review data columns that did not match to any question in Kinaki. The first time you import your Kobo data to the data collection tool several technical variables generated by Kobo will show up as new questions, these are variables such as start, end, id, or form version, you can select “Save All Questions” to import all of these together with your data. If you believe you will need one of these technical variables for your analysis, consider changing the question types as indicated on the screenshot below.
Note: You can review the question types here, to ensure there are no mistakes.
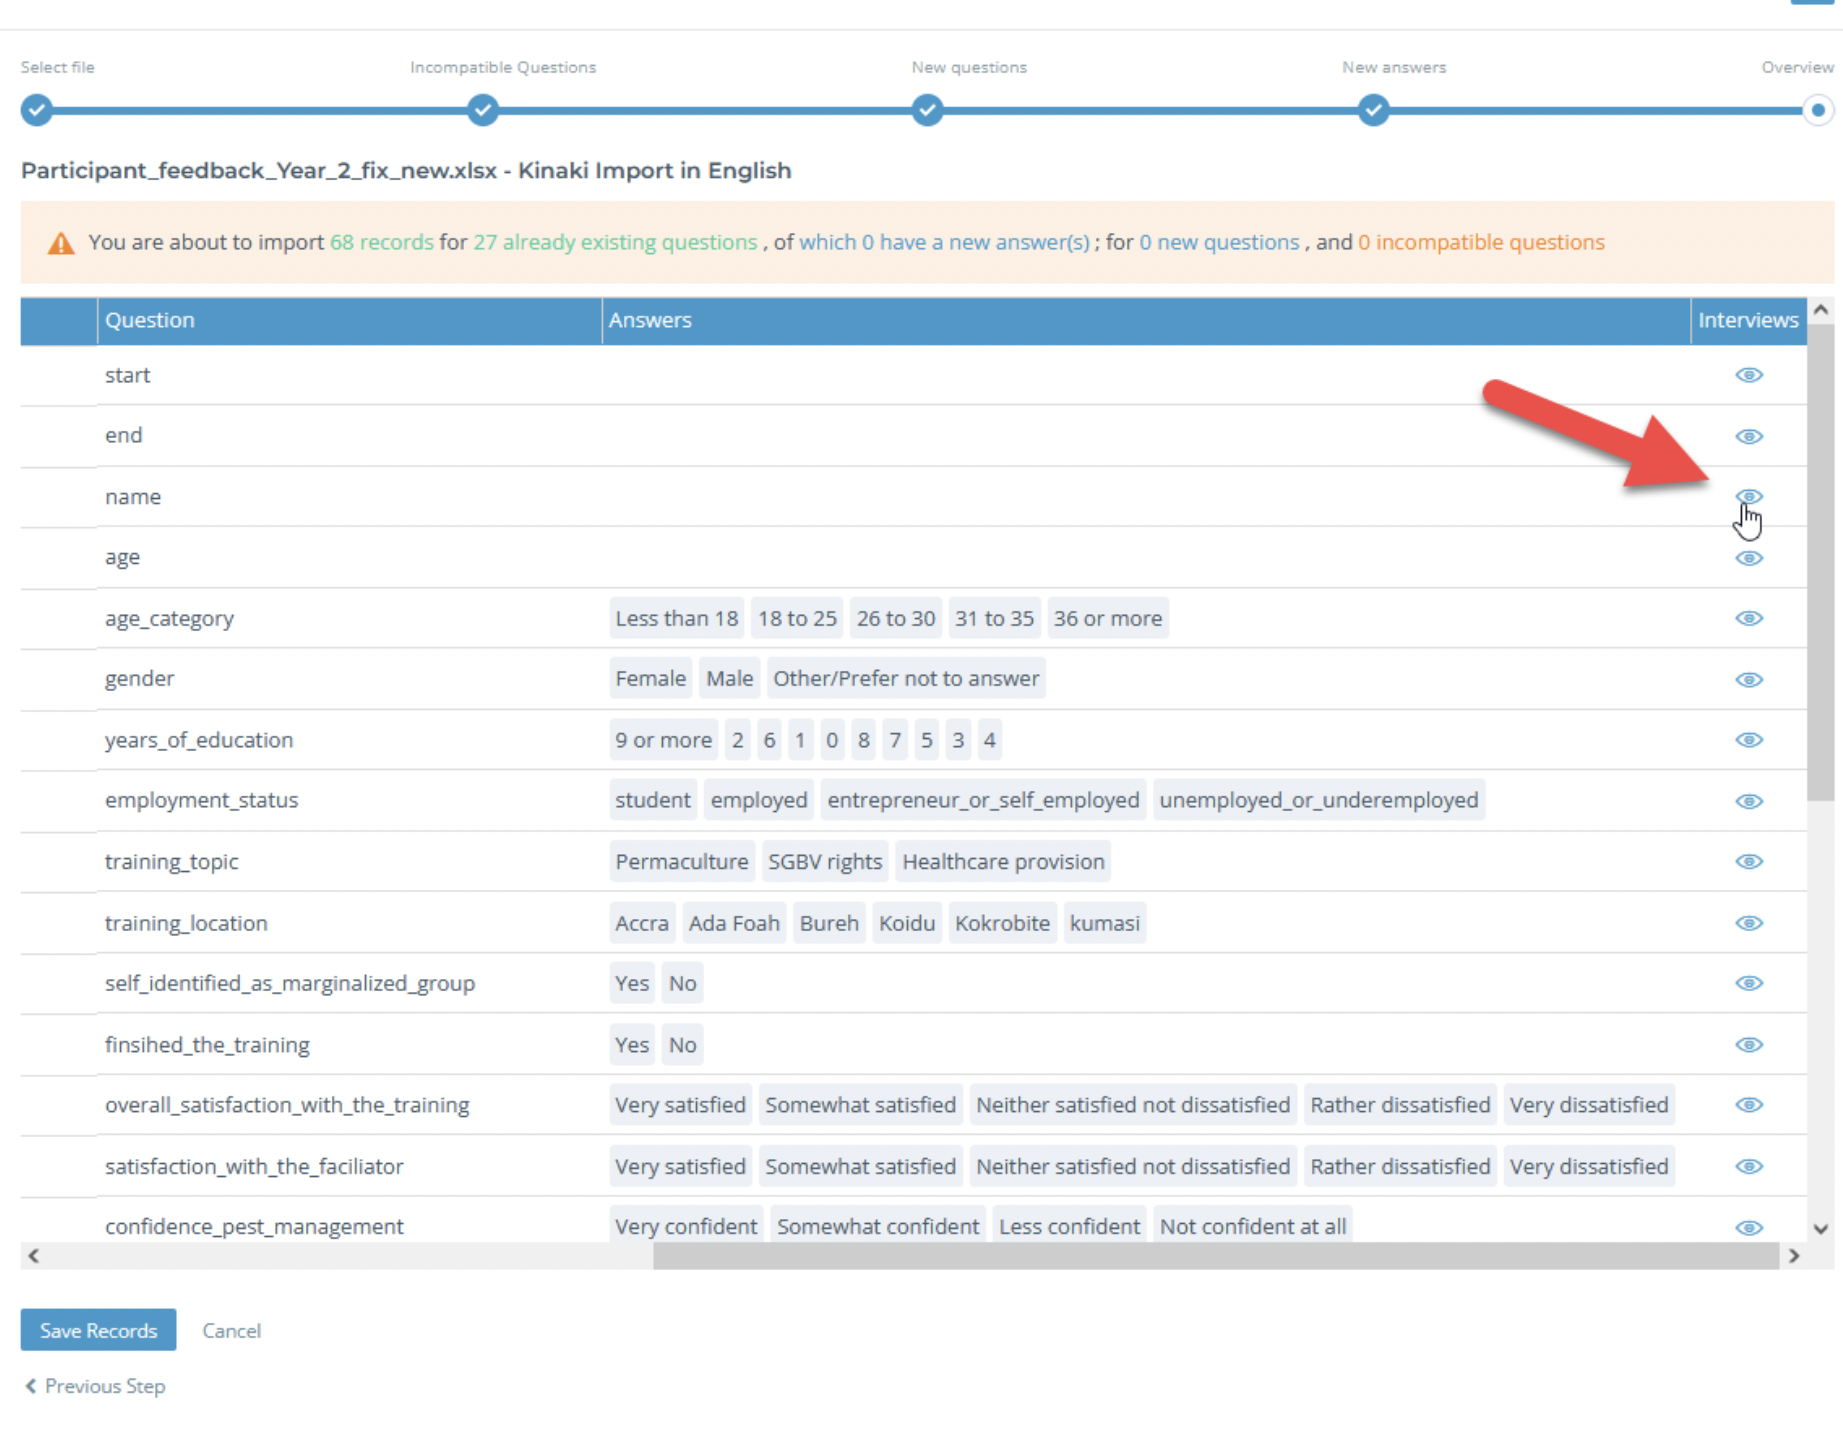
The final step of the import process will be to review your import. You can review the question name, type, text, answers, and select the eye icon next in any row to view the responses from the dataset (as shown by the arrow in the image below). Select Save Records at the bottom of the screen, to finalize your data import.
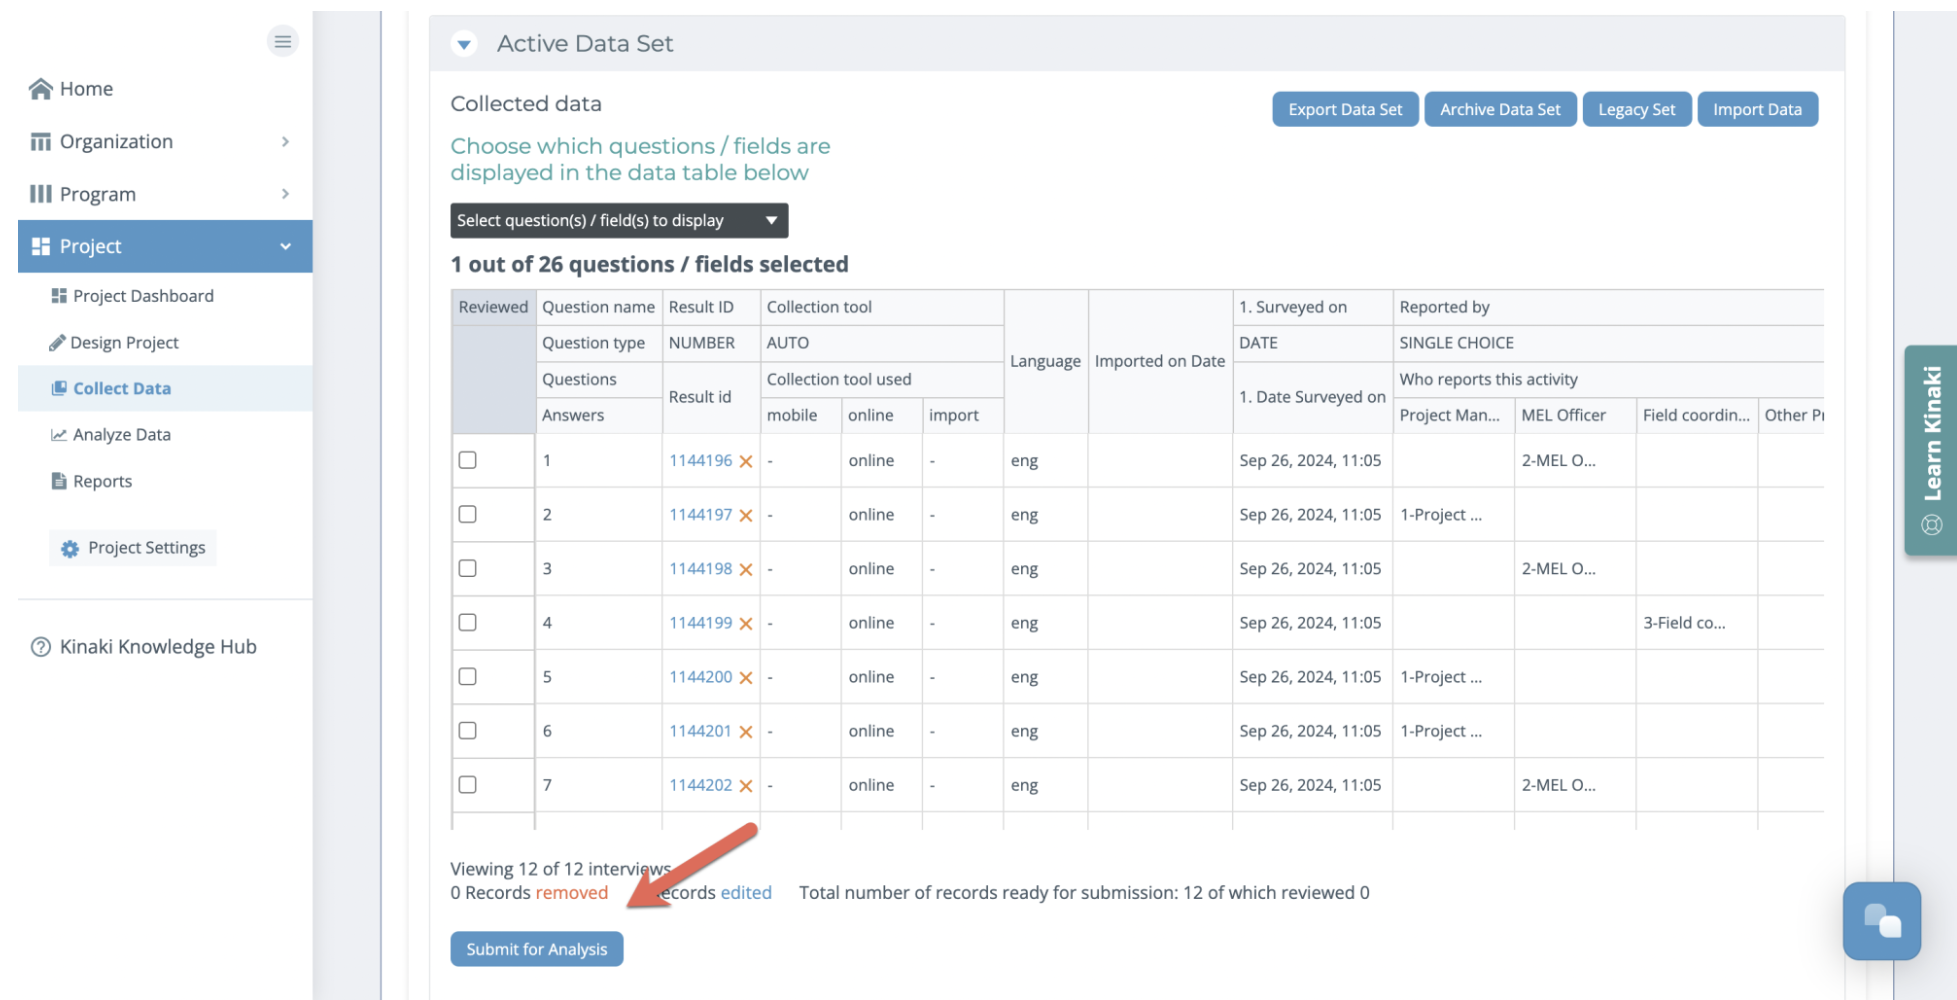
6) Submit data for analysis
The last step before you can begin your data analysis, is to submit the imported dataset for analysis. You can do this on the Data Management page by clicking Submit all records for Analysis.
Be sure to give your dataset a clear name before you confirm the submission. Now you will be able to see the dataset on the Analyze Data page, set up calculations for your indicators or see the results if the calculations were already set.
C) Assign Indicators to the DCT, Review Questions and Data
With your questions and dataset now imported to Kinaki, you will be able to begin your data analysis
First, make sure the indicators that you wish to calculate using the newly imported data are assigned to this Data Collection Tool. See the Indicators page guide on how to do this.
Ideally also attach the questions to the relevant indicators, but this step can be skipped, and you can proceed directly to the data analysis.
Using this process, Kinaki imported the column header from your data as both the Unique Question ID and the Question Name, and you may prefer to re-name the questions for your clarity (and to remove unnecessary underscores), but it is not necessary if you are fine with the question names as imported.
We do not recommend changing the Unique Question ID as the questions and data would not be matched correctly the next time you would import data.
Now, let’s look at Option 2 in the next article!