Let’s look at how we can aggregate project indicators under a Program Indicator and also learn how to match and organize data from different Projects under a Program.
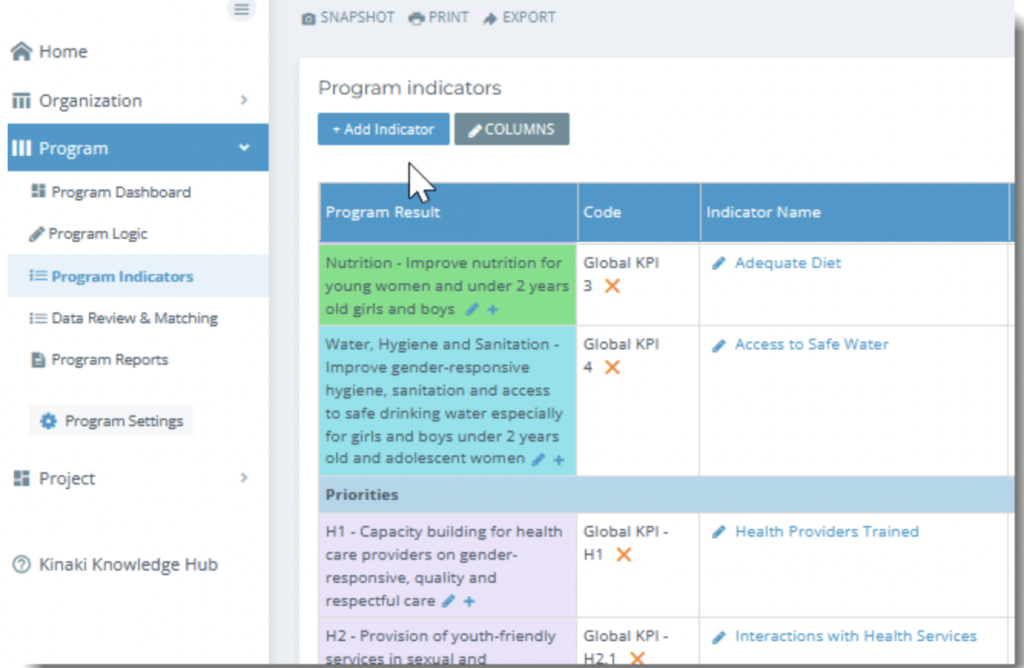
To get to the Program Indicators page, click on Program from the main menu and on Program Indicators.
If you’ve created your Program Logic, your results statements will auto-populate here, just like when you developed a Project Logic.
Before diving into the two types of Program level Indicators, let’s quickly look at the two ways of adding indicators: 1) Add an Indicator Manually, or 2) Add an Indicator through the Indicator Library.
Adding an Indicator Manually
Add a new indicator by selecting “Add Indicator”.
In this pop-out box, you can either add an indicator from the indicator library or create one from scratch (manually) in the pop-out box.
Program Indicators have two different types in Kinaki, as mentioned earlier:
1) Aggregated from project results 2) Calculated from project details
Once you have filled out the mandatory fields (Indicator Code and Name) and other relevant information, click “Next“.
The next window is where you choose whether you are Aggregating from Project Results or Calculating by Project Details (your custom fields).

Adding an Indicator from the Indicator Library
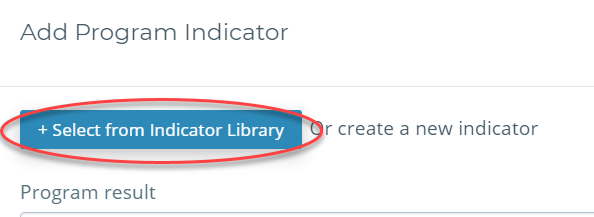
Add a new indicator by selecting “Add Indicator”. In the pop-out box, select “+Select from Indicator Library”.
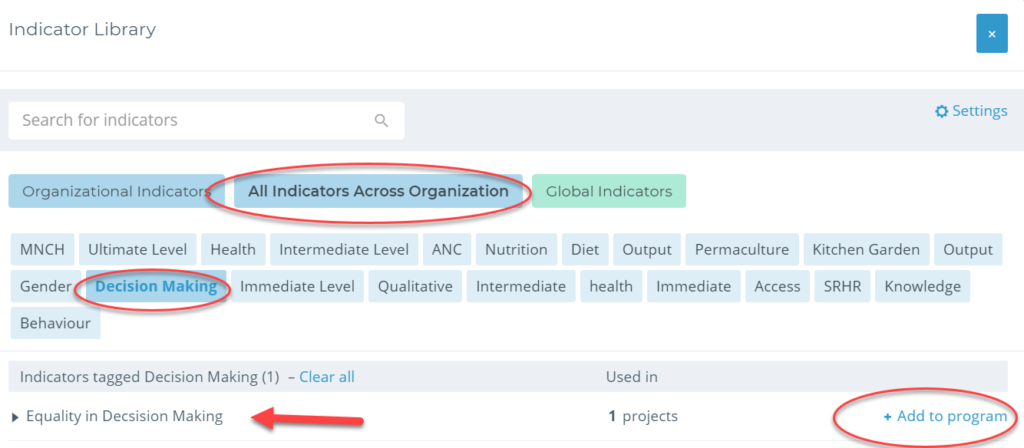
In the Indicator library, you can choose from Organizational Indicators (indicators that have been added by your organization, either for this program or project, or another one) or Global Indicators (indicators that are organized by a variety of topics that have international guidance).
Note: Using the Indicator Library can be key for Program level calculations. You can choose indicators that are shared between projects that have the exact same details, rather than piecing together different ones.
When you select the topic of indicators, they will populate below and you can add them directly to your program by checking the box on the right-hand side “+Add to program”.
You can then edit details of the indicator, and then follow the same steps as you would if you added an indicator manually – where you can choose whether you are Aggregating from Project Results or Calculating by Project Details (your custom fields), and follow the remaining steps.
Now let’s look at the two types of Program Indicators:
1) Indicators Calculated from Project Details
For indicators calculated from project details, your calculation is based on information that you’ve entered about your project in “Project Details” (accessed through Project Settings) or Custom Fields.
This type of indicator would be used, for example, if you want to have an indicator that calculates the total budget of all your Projects or an indicator that shows how many Projects you have in a specific country.
Let’s go over how to create one of these types of indicators:
On the “Program Indicators” page select ” Add Indicator”:
Add the indicator details and select “Next”:
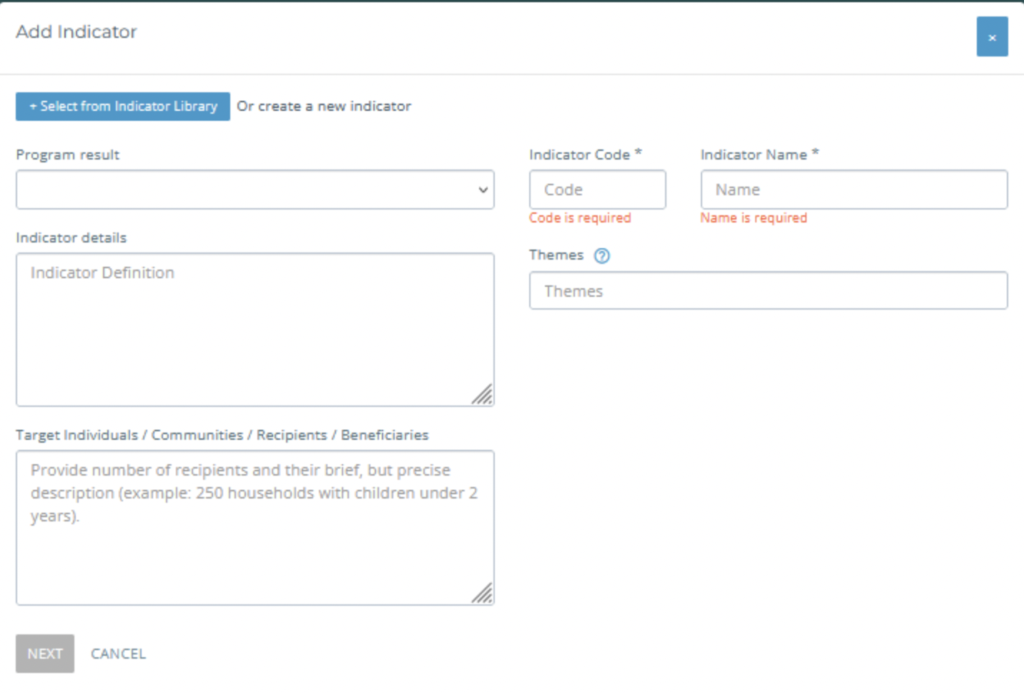
Then select whether this indicator will be “Calculated from Project details” or “Aggregated from Project results”:

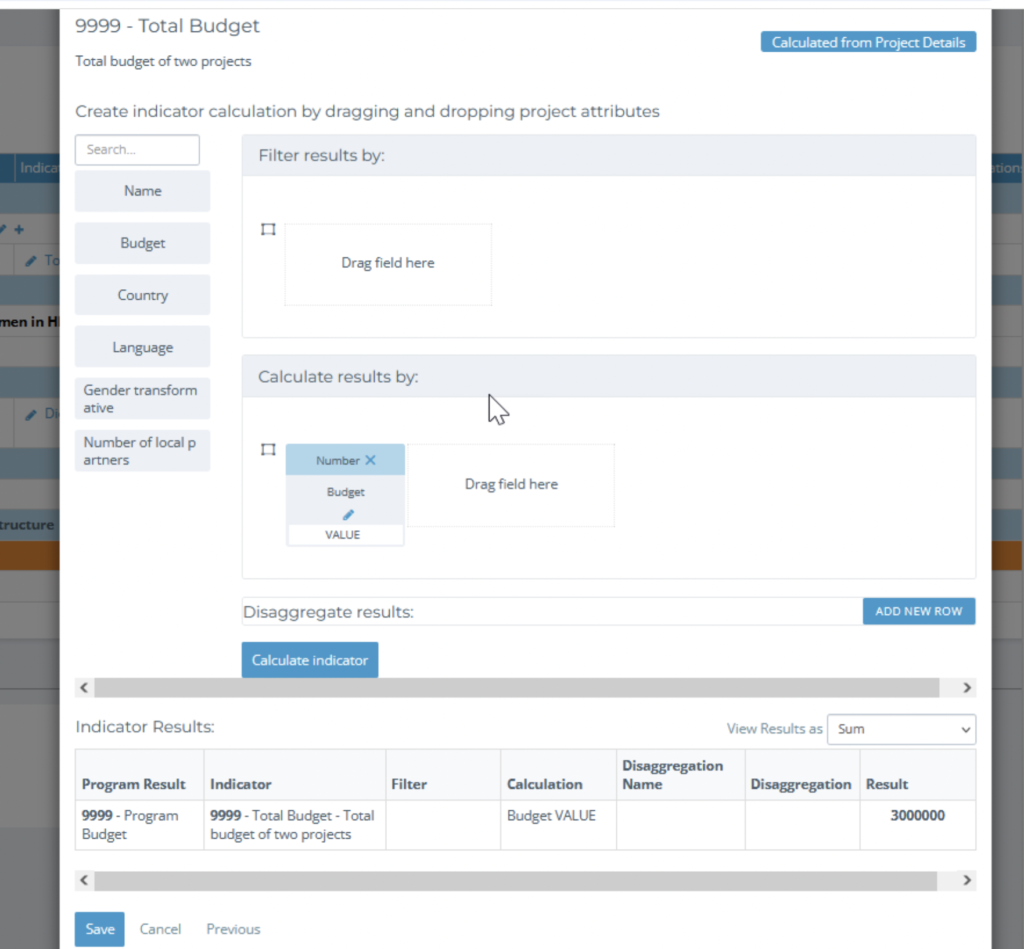
Selecting Calculated from Project Details will bring you to a box where you can set the filter, calculation and disaggregations. You will recognize this interface from the “Analyze Data” page in Project. Create your calculation and disaggregations by dragging in the appropriate project attributes to the calculation and disaggregation sections. In the example below, we are calculating the total budget of the Program and creating disaggregations for the two countries in the Program. (You can see a video on creating this calculation further down the page.
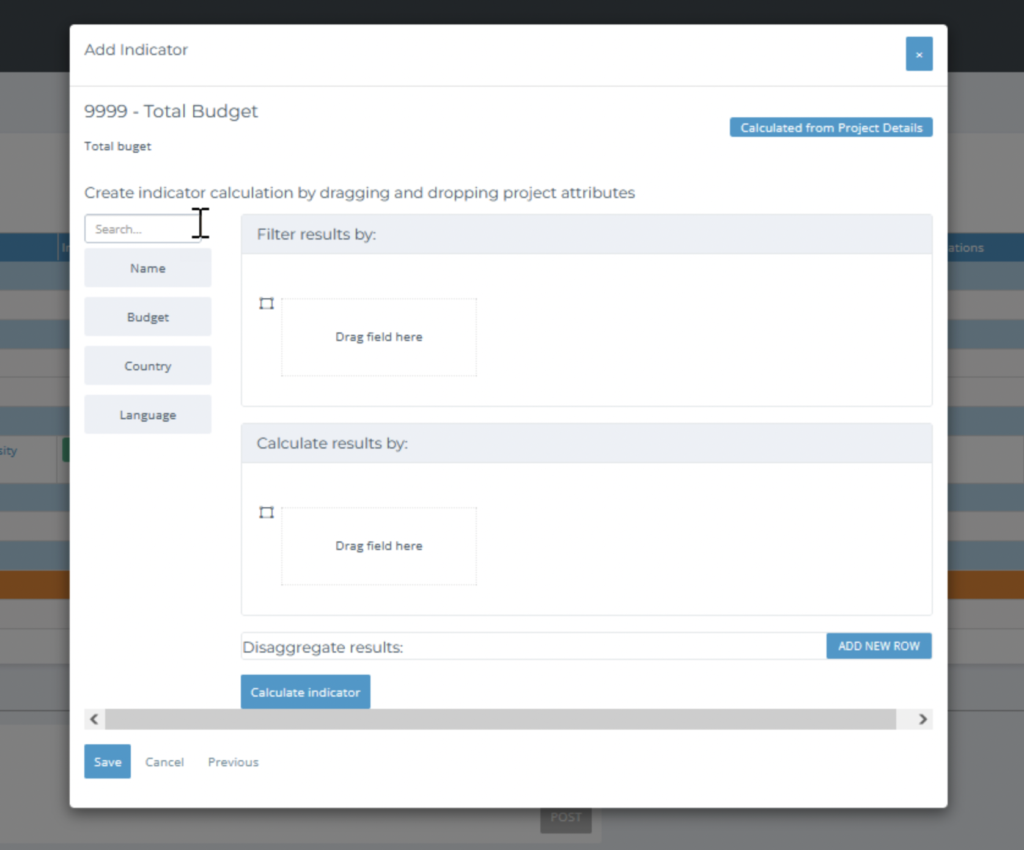
Create your calculation and disaggregations by dragging in the appropriate project attributes to the calculation and disaggregation sections. In the example below, we are calculating the total budget of the Program.
Select “Calculate indicator” to see the indicator results and select “Save” to save the indicator to your Program.
Not sure what to calculate? This part of Kinaki is very similar to the Analyze Data course you may have completed. Feel free to also check out the Analyze Data section of the Kinaki Knowledge Hub to learn more about setting calculations.
2) Indicators Aggregated from Project Results
This option allows you to aggregate results from indicators in your Projects .
Let’s review how to create one of these types of indicators:
When you select “Add indicator” on the “Program Indicators” page, select the relevant “Program Result” from the drop-down menu and enter the Indicator details, code and name and select “Next”:
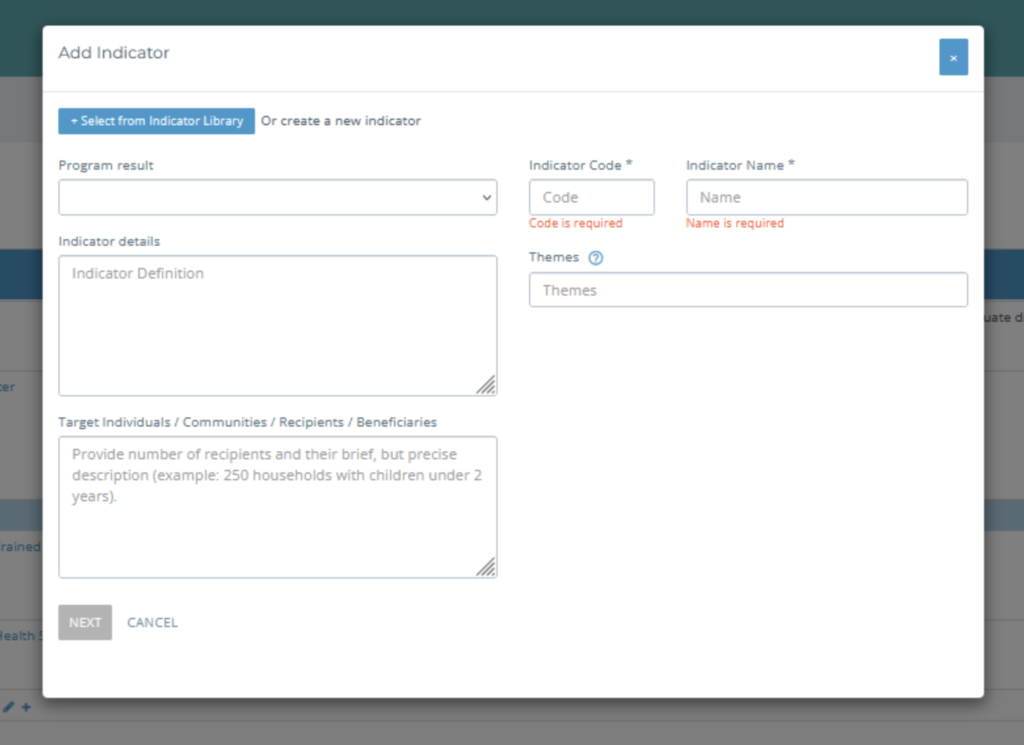
Then select “Aggregated from Project Results” as the Program Indicator Type, then select “Next”:

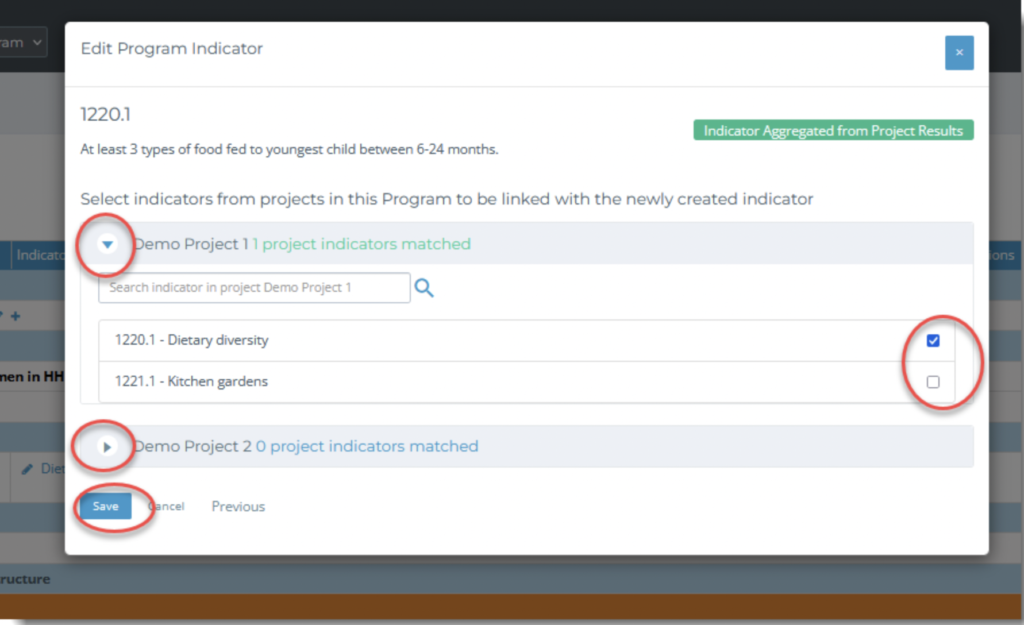
Selecting “Aggregated from Project Results” will bring you to a page where you can select all available indicators you may wish to aggregate from the different Projects in your Program.
Indicators from each of the Projects in your Program will appear. You can select the indicators to be aggregated by clicking on the small triangle next to the Project’s name and checking the box next to the indicator you would like matched. Do this for each of the Projects in your Program that have indicators to match this Program-level indicator. Then select “Save”:
