The Indicator Library can help your organization to standardize indicators and to save time when designing a new project’s performance measurement framework.
To learn more about using the Indicator Library, visit this page in the Knowledge Hub!
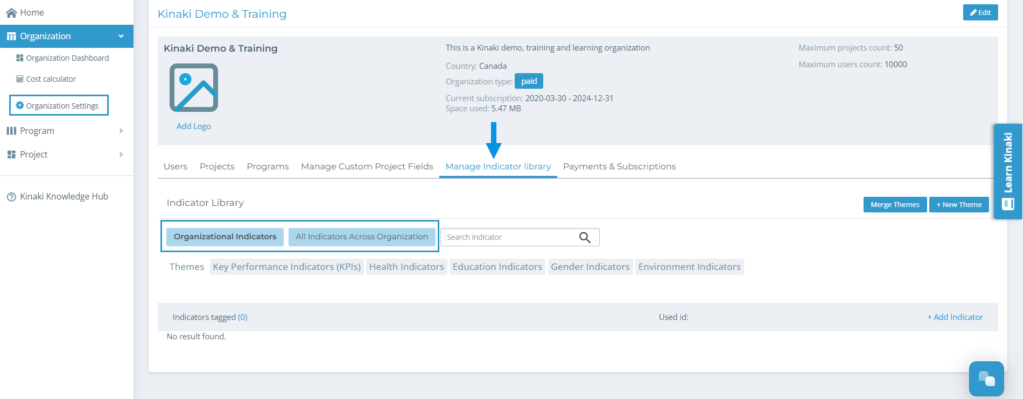
To manage the Indicator Library, visit “Organization Settings“. Here, select the “Manage Indicator Library” tab.
In this section, you will see the custom indicators that have been added to your library: Organizational Indicators and All Indicators Across Organization.
Global Indicators are curated by the Kinaki team.
Know an indicator that could help other organizations? Get in touch and let us know!
► Adding an Organization Indicator
To create an organization indicator, select the title from the two indicator options.
Next, select “+ Add Indicator”. Enter the information needed for your indicator.
This is the similar information needed when creating an indicator on the Indicators page, but without the connections to project results or data collection tools.
Select “CREATE” to continue.
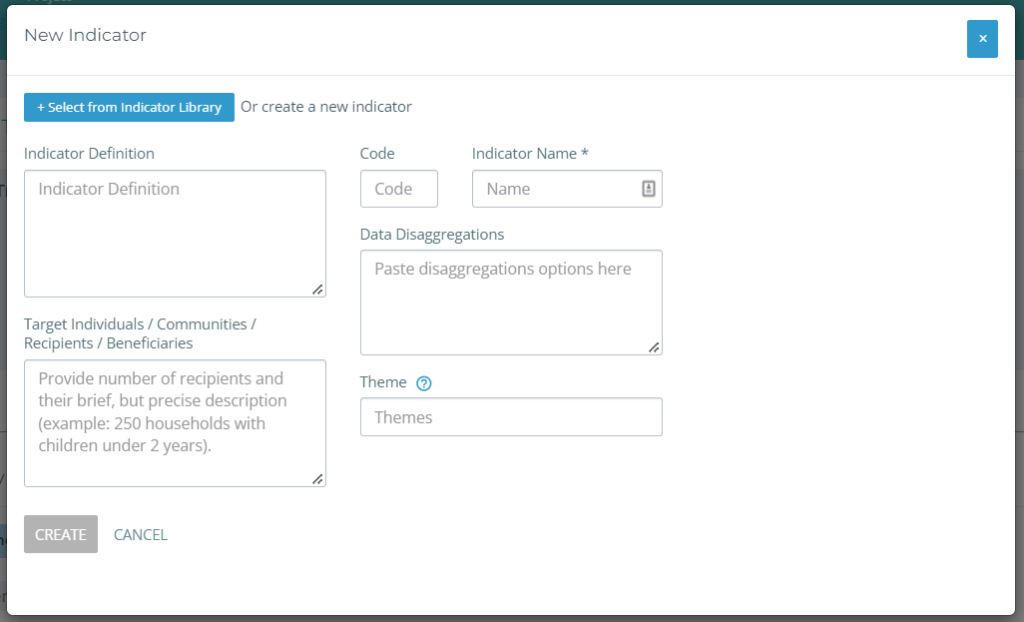
These details can be changed in the library or at the project-level. Kinaki will use themes to organize your indicators in the library, so consider adding one or more theme tags.
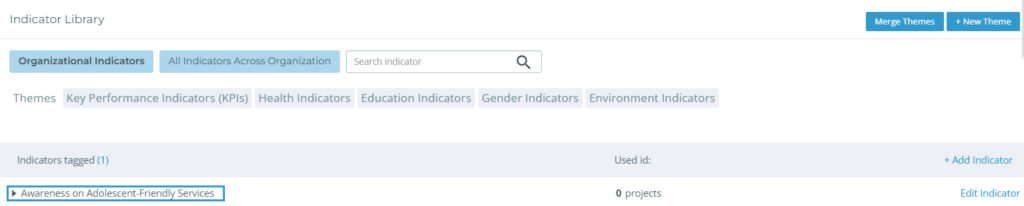
Next to the completed Indicator, select “+ Add to Library”. Once an Indicator has been added, you can edit the details by selecting “Edit Indicator”.
► Adding an Existing Project Indicator
Selecting “All Indicators Across Organization” will allow you to add an indicator from the project-level.
Kinaki will sort your Indicators by themes, so select from the tags or search the title.
Select “Add to Library” to continue.
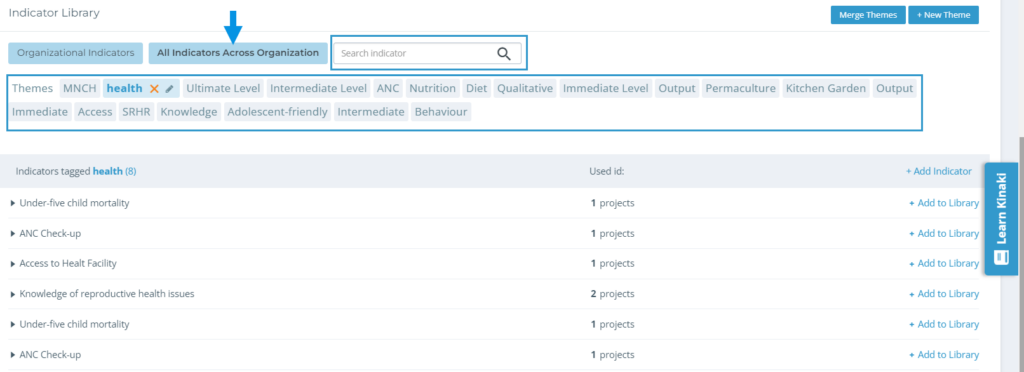
Once an Indicator has been added, it will be listed under “Organization Indicators”.