On the Data Management page, you can edit your data to ensure the highest quality prior to analysis.
Data cleaning is an essential practice in monitoring and evaluation work and allows the data collection practitioner to make corrections to errors that may alter the presentation and analysis of a given dataset.
Kinaki is a web-based platform, which limits some aspects of data cleaning and review.
For larger datasets that require large amounts of processing, it may be relevant to explore how to use Microsoft Excel for Data Cleaning with Kinaki.
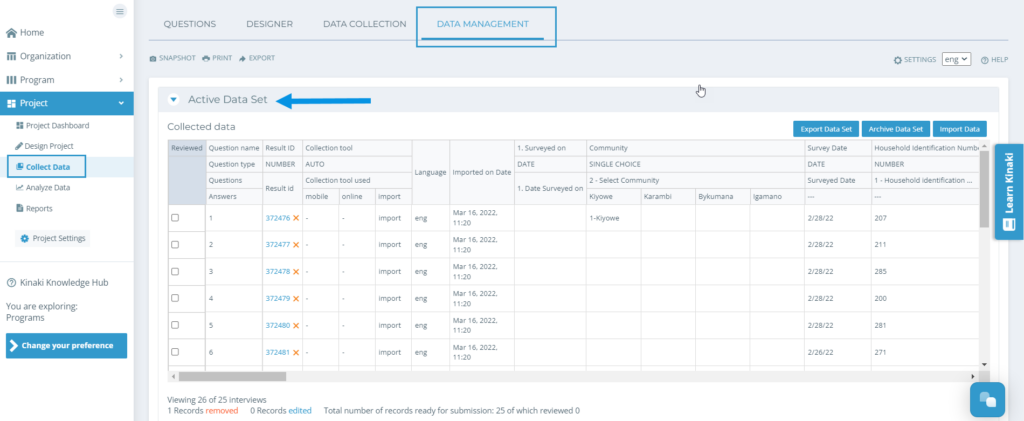
To begin, go to Collect Data from the main menu on the left and select the Data Management tab. Here, we can review data and submit it for analysis.
NOTE: Heads up! Make sure you “archive”, “delete” or “submit” any older dataset. If you import a new dataset (or resume collecting data with an Online Form) while the old or previously collected data is still showing as active uner the “Active Data Set” tab, the data will merge.
Editing an ‘Active Data Set’
If you have recently completed data collection for a specific data collection tool, your dataset will appear at the top of the page, under the “Active Data Set” tab, if it has not yet been submitted for analysis.
This survey data may be from a recent data import, or the results of data collected from an online form.
If the data collection tool is active, you will see a note above the Active Data Set tab that says “Ongoing data collection for this Data Collection Tool”.
Our team recommends completing your data collection prior to the data cleaning process. You can turn off your survey on the “Data Collection” tab.
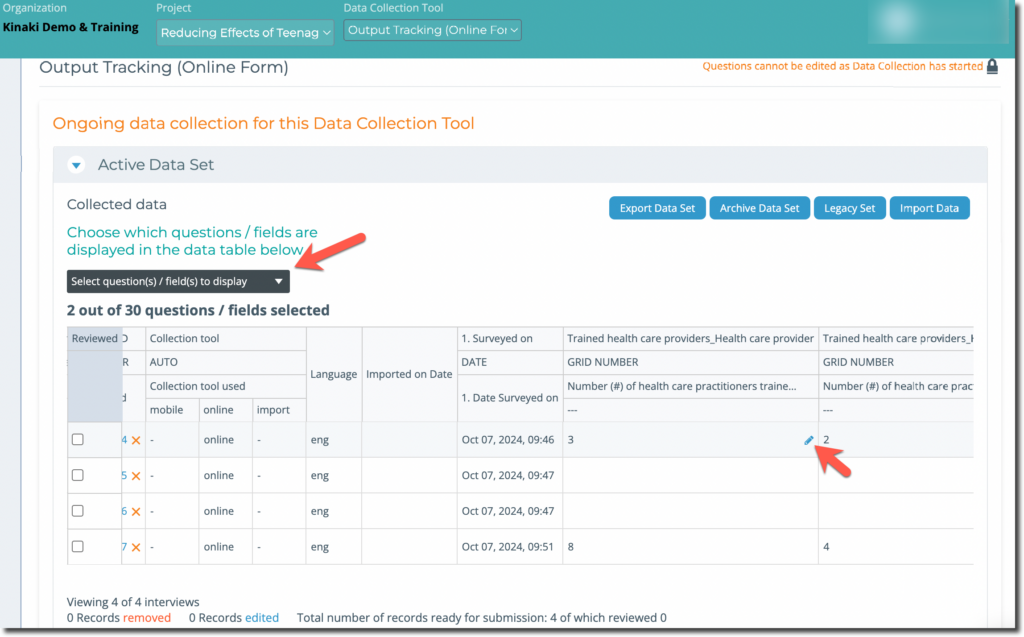
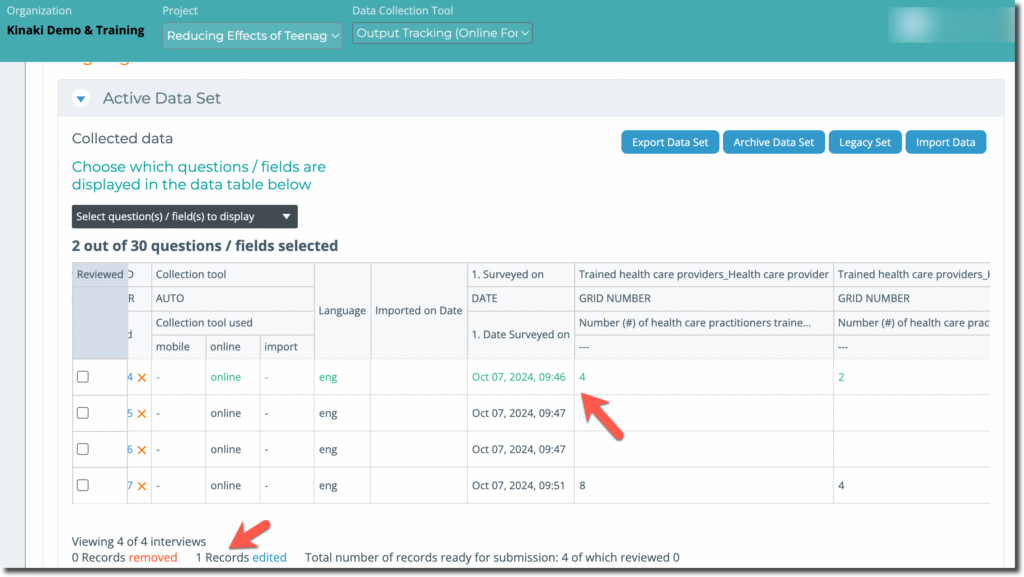
With the Active Data Set, use the scrollbars on the bottom and side of the page to navigate through the responses.
Each column has a survey question or an information marker, and contains the question name, type, and full description in proceeding rows at the top of the column.
Each row represents one entry. These are labeled by the number (in the second column) and the result (or participant) ID.
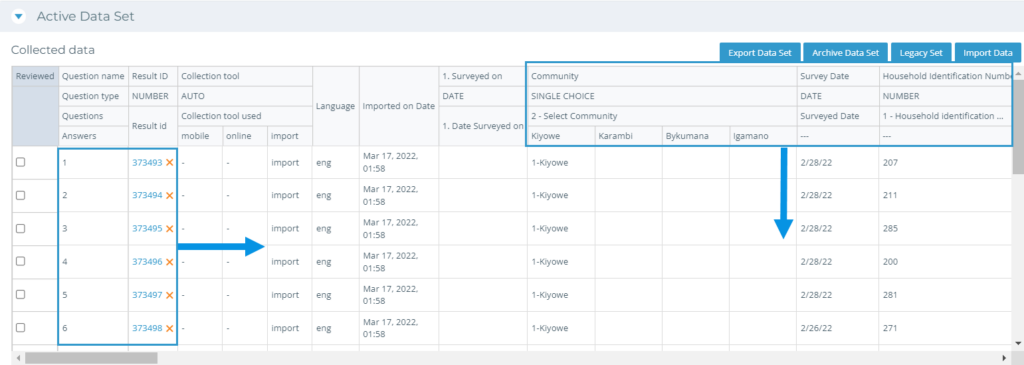
Select your questions from the drop-down menu. To make changes to an answer provided in one of the entries, find the response in the appropriate row and select the pencil icon. Click on ‘save’ and the change will show up; if it does not appear, refresh the page.
The response must align with the particular question type. For example, for a single choice question, you may only select one response from the provided options, and a number response will only accept set numerical formats.
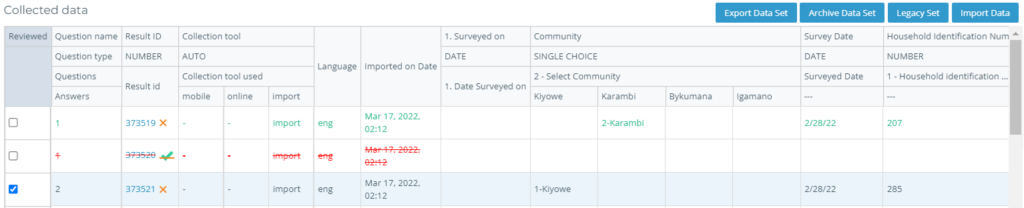
To delete an entire entry, select the “x” button next to the “Result ID”. To restore a deleted response, click on the green check-mark next to the corresponding “Result ID”.
Responses that have been edited will appear with green text. Responses that have been deleted appear with a strike-through.
When you have finished with a particular entry, select the check-box in the first column. This will allow you to keep track of which entries have been reviewed by your team.
When you are done editing, you will notice that Kinaki has kept a record of the number of changes. In the data set shown in the image below, only one entry was edited.
Editing a ‘Submitted Data Set’
If you have to make changes to a data set that has already been submitted, you have to go to ‘Submitted Data Sets’ under the ‘Manage Data Sets‘ tab. (Scroll further for a step-by-step video.)
Submitted data sets can not be edited directly.
Note: Opening a submitted data set will override the “Active Data Set”, so be sure to save your work by archiving or submitting for analysis the active data set.
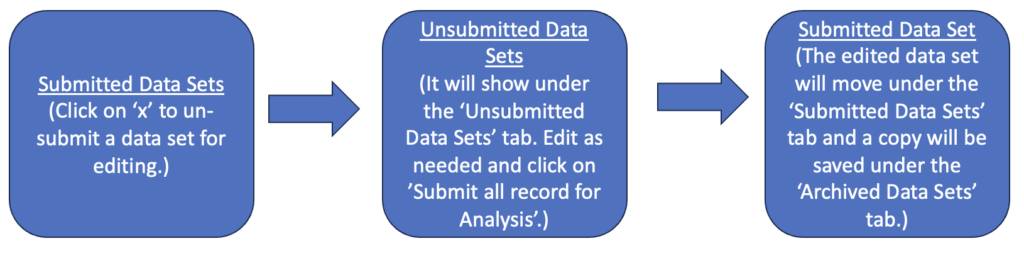
For submitted data sets, it is not possible to make changes directly, so you have to ‘un-submit’ the dataset first by clicking on the ‘x’ sign next to the name (when you hover over the name, you will see the options). If you only want to change the name of the data set, use the pencil icon. Note, when the data set was submitted initially, a copy was saved under the ‘Archived Data Sets’ tab.
Once un-submitted, the data set is ready to be edited under the ‘Unsubmitted Data Sets’ tab. Open it and make the needed changes; the process is similar as described under the first heading. Then click on ‘Submit all records for Analysis‘. The “restore” function for “Unsubmitted Data Sets” will also return the data set to ‘Submitted Data Sets’. The edited dataset will now move to ‘Submitted Data Sets” tab and Kinaki will make a copy of it, and the copy will show up under the “Archived Data Sets” tab.
Note: Whenever a data set is submitted, either from active data sets or through un-submitted data sets route, Kinaki saves a COPY in archives with a time stamp.
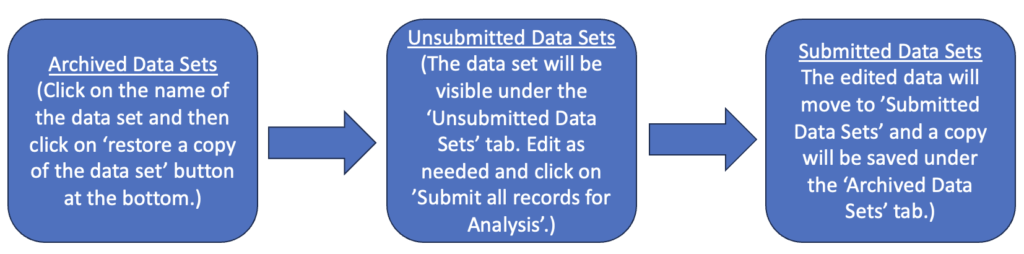
The following infographic shows the journey of a submitted data set, that needs editing:
Editing an ‘Archived Data Set’
You can’t edit data sets in the archive section. From archives, if you open a data set, you can “restore a copy of the data set” by clicking on the button and it will go to the un-submitted datasets tab. Here, you can make the needed change and then submit it for analysis or click on restore. As you submit, the data set will move to ‘Submitted Data Sets’ and a copy will also be saved in archives.
The following infographic shows the journey of an archived data set, that needs editing: